

Use the Visual Editor to customize your theme with a live preview.
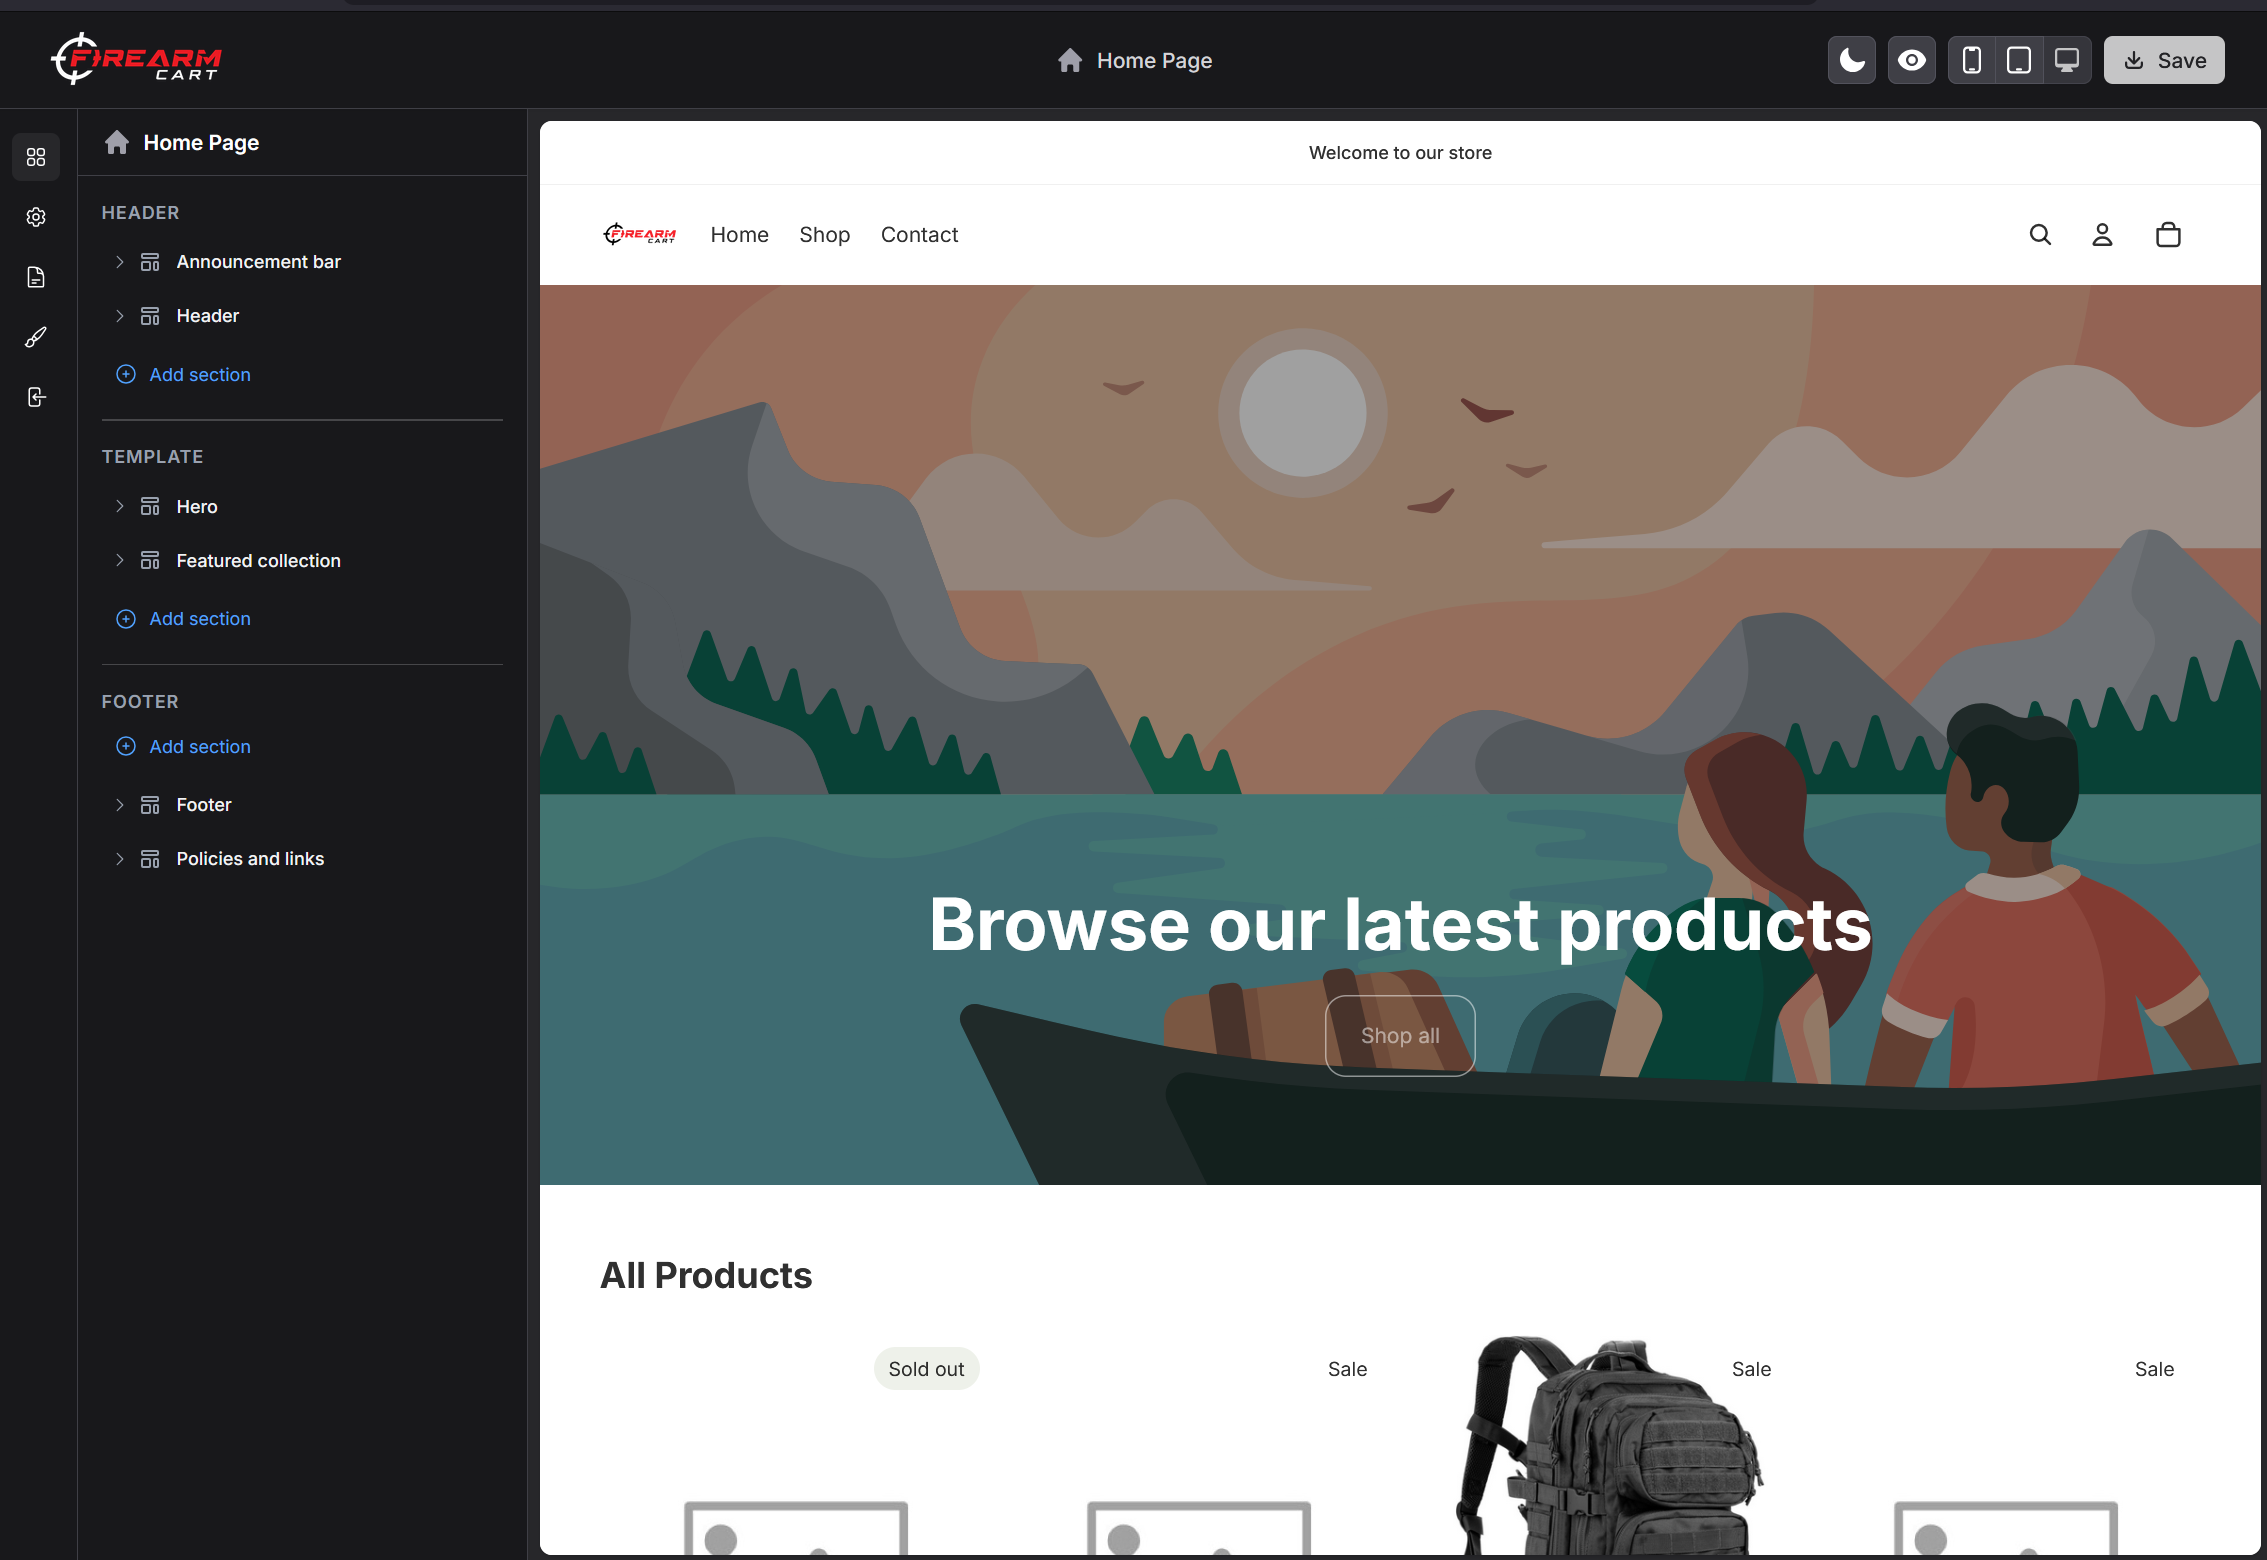
Accessing the Visual Editor
- Navigate to Store > My Store in the sidebar
- Find your theme — the current theme is at the top, other themes are under Theme library
- Click Customize
The Visual Editor opens with a sidebar on the left and a live preview beside it. It is a desktop-only screen.
Editor Layout
| Area | Description |
|---|---|
| Icon rail | Switch the left pane between Sections, Page settings and Theme settings |
| Left sidebar | The section list for the current page, grouped into Header, Template and Footer |
| Preview area | Live preview of your store, in an interactive frame |
| Template selector | Switch between page templates (with a search box) |
| Device modes | Mobile, tablet and desktop preview |
| Right sidebar | Settings for the selected section or block |
| Save button | Save your changes — enabled only when there is something unsaved |
The right settings pane is hidden on narrow displays; widen the browser window if it disappears.
Theme Settings
Click the Theme settings icon in the rail to access global settings. What’s available comes from your theme, but typically includes:
- Colors and color schemes (you can add, edit and delete schemes)
- Typography
- Page layout
- Buttons, cards, badges, drawers and other component defaults
Theme settings apply to every page. They are staged for preview as you change them and are written to the theme when you click Save.
Your logo is not a theme setting. It comes from your store settings and overrides whatever the theme has — changing it in the editor’s picker will not take effect. See Store Information.
Collection Filters
The Collection Filters setting chooses which specifications appear as filters on collection pages. It shows up in Theme settings once your products have specifications.
With nothing selected, every specification that has at least two different values becomes a filter. On a catalog imported from a distributor that can mean hundreds of dropdowns, many of them internal codes such as part numbers, units of measure or “Feature 1”. Select the handful your customers actually narrow by, for example Manufacturer, Caliber / Gauge, Action, Capacity and Barrel Length.
- Calibers are merged. Caliber, Gauge and Caliber/Gauge appear as one Caliber / Gauge option and one filter.
- Filters follow the products. A filter only appears on collection pages whose products carry that specification, so ammunition and optics filters can sit in the same list as firearm filters.
- Some filters are built in. Availability, Price and Sale always show, as do Product type on pages with more than one type and In Store when your catalog uses it. They are not part of this list.
- Order is alphabetical. The storefront lists filters alphabetically, whatever order you select them in.
The selection is saved with the theme when you click Save, and each theme keeps its own. An AI client connected to the Theme Dev MCP server can choose the list for you from your catalog data, using the list-collection-filters and set-collection-filters tools.
Collection Pages
Show out-of-stock products last moves sold-out products to the end of every collection page, including the all-products page at /collections/all, whatever sort order or filters a shopper picks. In-stock products keep the chosen order among themselves, and so do the sold-out ones after them. A product counts as sold out when the Availability filter lists it under Out of stock: nothing purchasable is left across its variants and it does not allow backorders.
The option is off by default. Search results are not affected: the search page keeps its own relevance and sort options. Like the filter list, it is saved with the theme when you click Save.
Page Editing
Switching Templates
Use the template selector at the top to edit different page templates:
- Home page
- Product pages
- Collection pages
- Cart, search and 404
- Blog and article pages
- Individual pages
Page Settings
The Page settings pane edits the page itself rather than the theme — title, slug, description and SEO title/description. It has its own Save Page Settings button, separate from the main Save.
Working with Sections
The sidebar shows all sections on the current page:
- Click a section to edit its settings
- Drag sections to reorder
- Click Add section to add new sections
- Click the eye icon to hide a section without deleting it
See Theme Sections for detailed section documentation.
Header and Footer
The header and footer are section groups that render on every page, so they appear in the sidebar above and below the current page’s sections no matter which template you are editing. Editing them changes your whole storefront, not just the page you are looking at.
What you can configure depends on the theme’s own header and footer sections — commonly the menu, logo placement, announcement bar, colour scheme, footer link columns and social icons.
Live Preview
Preview Features
- Updates as you change settings — only the affected section is re-rendered
- Mobile, tablet and desktop views
- Interactive preview: hover a section to select, duplicate, hide or delete it
Device Modes
Switch between device views to see how your store looks on different screens. Mobile previews at 375px wide, tablet at 768px, and desktop uses the full frame.
Saving Changes
- Make your changes
- See them in the live preview
- Click Save in the top right
Save writes to the theme you are editing. If that is your published theme, the change is live on your storefront immediately. If it is a theme from your library, the change is saved to that copy and only goes live when you publish it from My Store.
There is no undo, and no warning that you are editing the live theme — duplicate a theme first if you want a safety net.
Developer Mode
For advanced users making frequent changes:
- Navigate to Store > My Store
- Open the Theme options dropdown
- Select Enable Dev Mode and pick a duration: 30 minutes, 2 hours or 8 hours
Developer mode:
- Bypasses caching so changes appear immediately
- Also enables Cloudflare developer mode if you have an active custom domain
- Turns itself off when the duration you chose expires
Media Library
Click any image picker — in a section, a block, or theme settings — to open the media library. It has three tabs:
- My Library — images already uploaded to your store, searchable
- Stock Images — searchable stock photography, added to your library when you pick one
- Upload Images — upload new files, several at a time
Editing Theme Code
The Visual Editor does not edit Liquid. To work on theme files directly, go to Store > My Store, open the … menu on a theme and choose Edit Code. The code editor opens as its own page and keeps a version history you can restore from.
Related Documentation
- Theme Sections - Managing sections
- Liquid Variables - Template variables
- Store Information - Logo and branding