Getting Started
Welcome to FirearmCart! This guide will walk you through the essential steps to launch your firearm retail store. Most stores can be set up and ready to accept orders within an hour.
Quick Setup Checklist
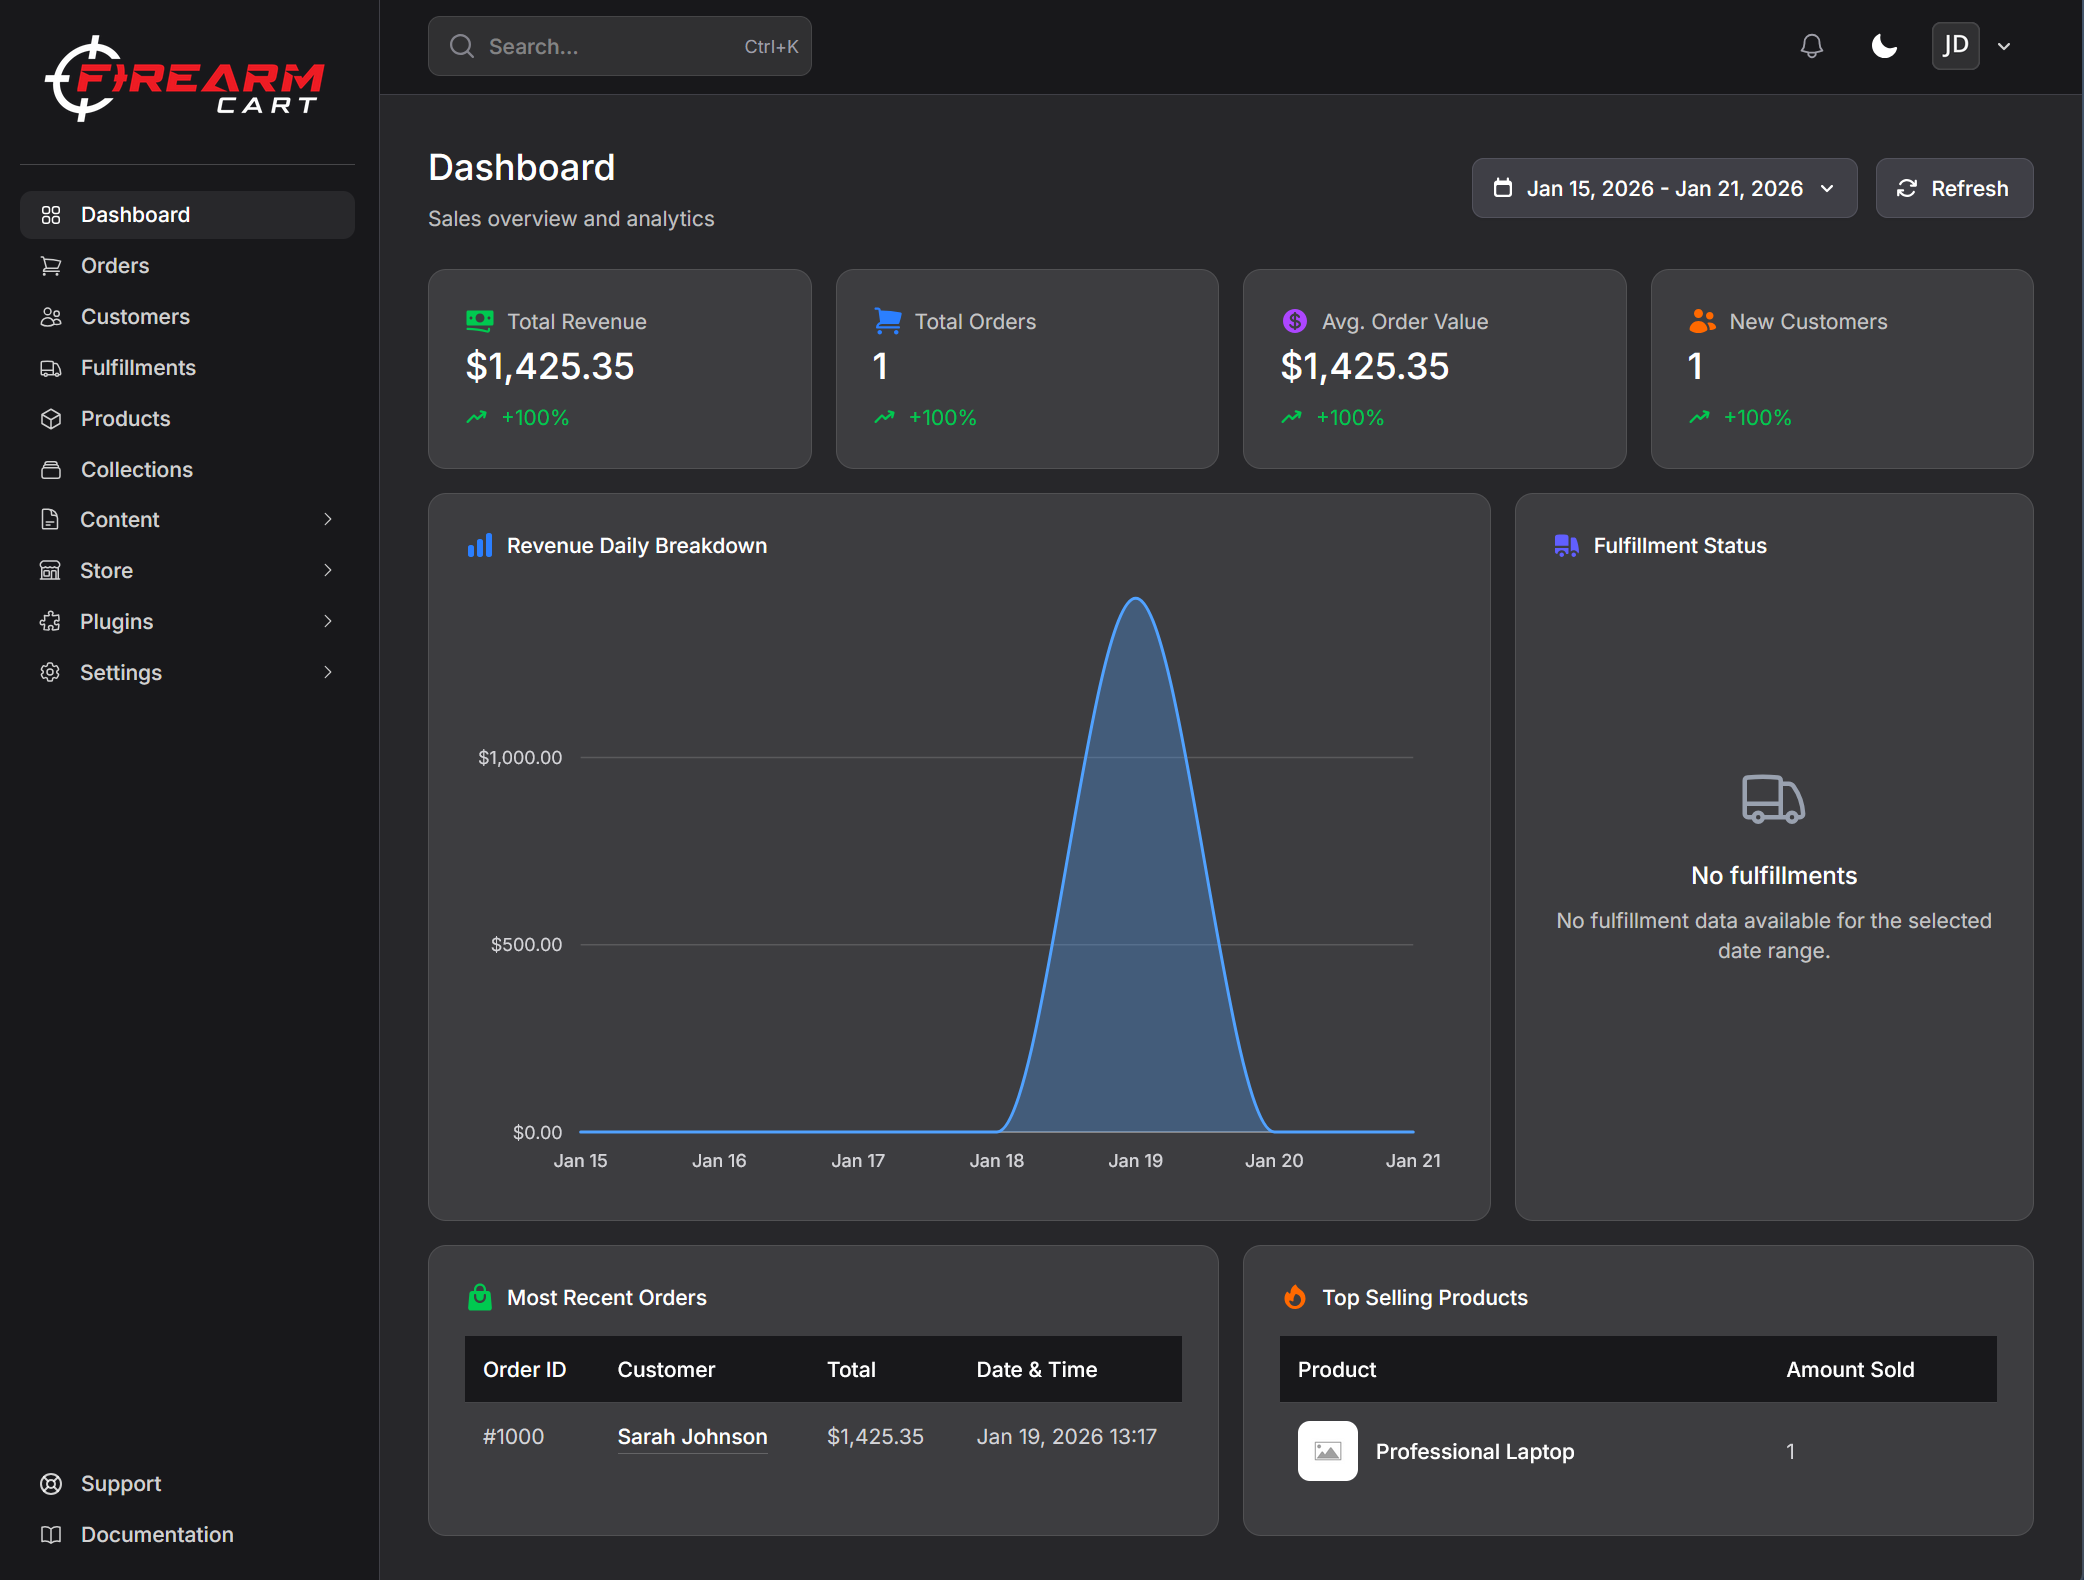
Your dashboard includes a setup checklist that tracks your progress. Complete each step to get your store ready for launch:
| Step | Task | Time Estimate |
|---|---|---|
| 1 | Store Information | 5-10 minutes |
| 2 | Payment Provider | 10-15 minutes |
| 3 | Shipping | 15-20 minutes |
| 4 | Products | Varies |
| 5 | Theme Customization | 10-30 minutes |
| 6 | Domain (Optional) | 5-10 minutes |
| 7 | Launch | 2 minutes |
Step 1: Store Information
Your store information appears throughout your website, emails, and invoices. Getting this right from the start ensures a professional presence.
Accessing Store Settings
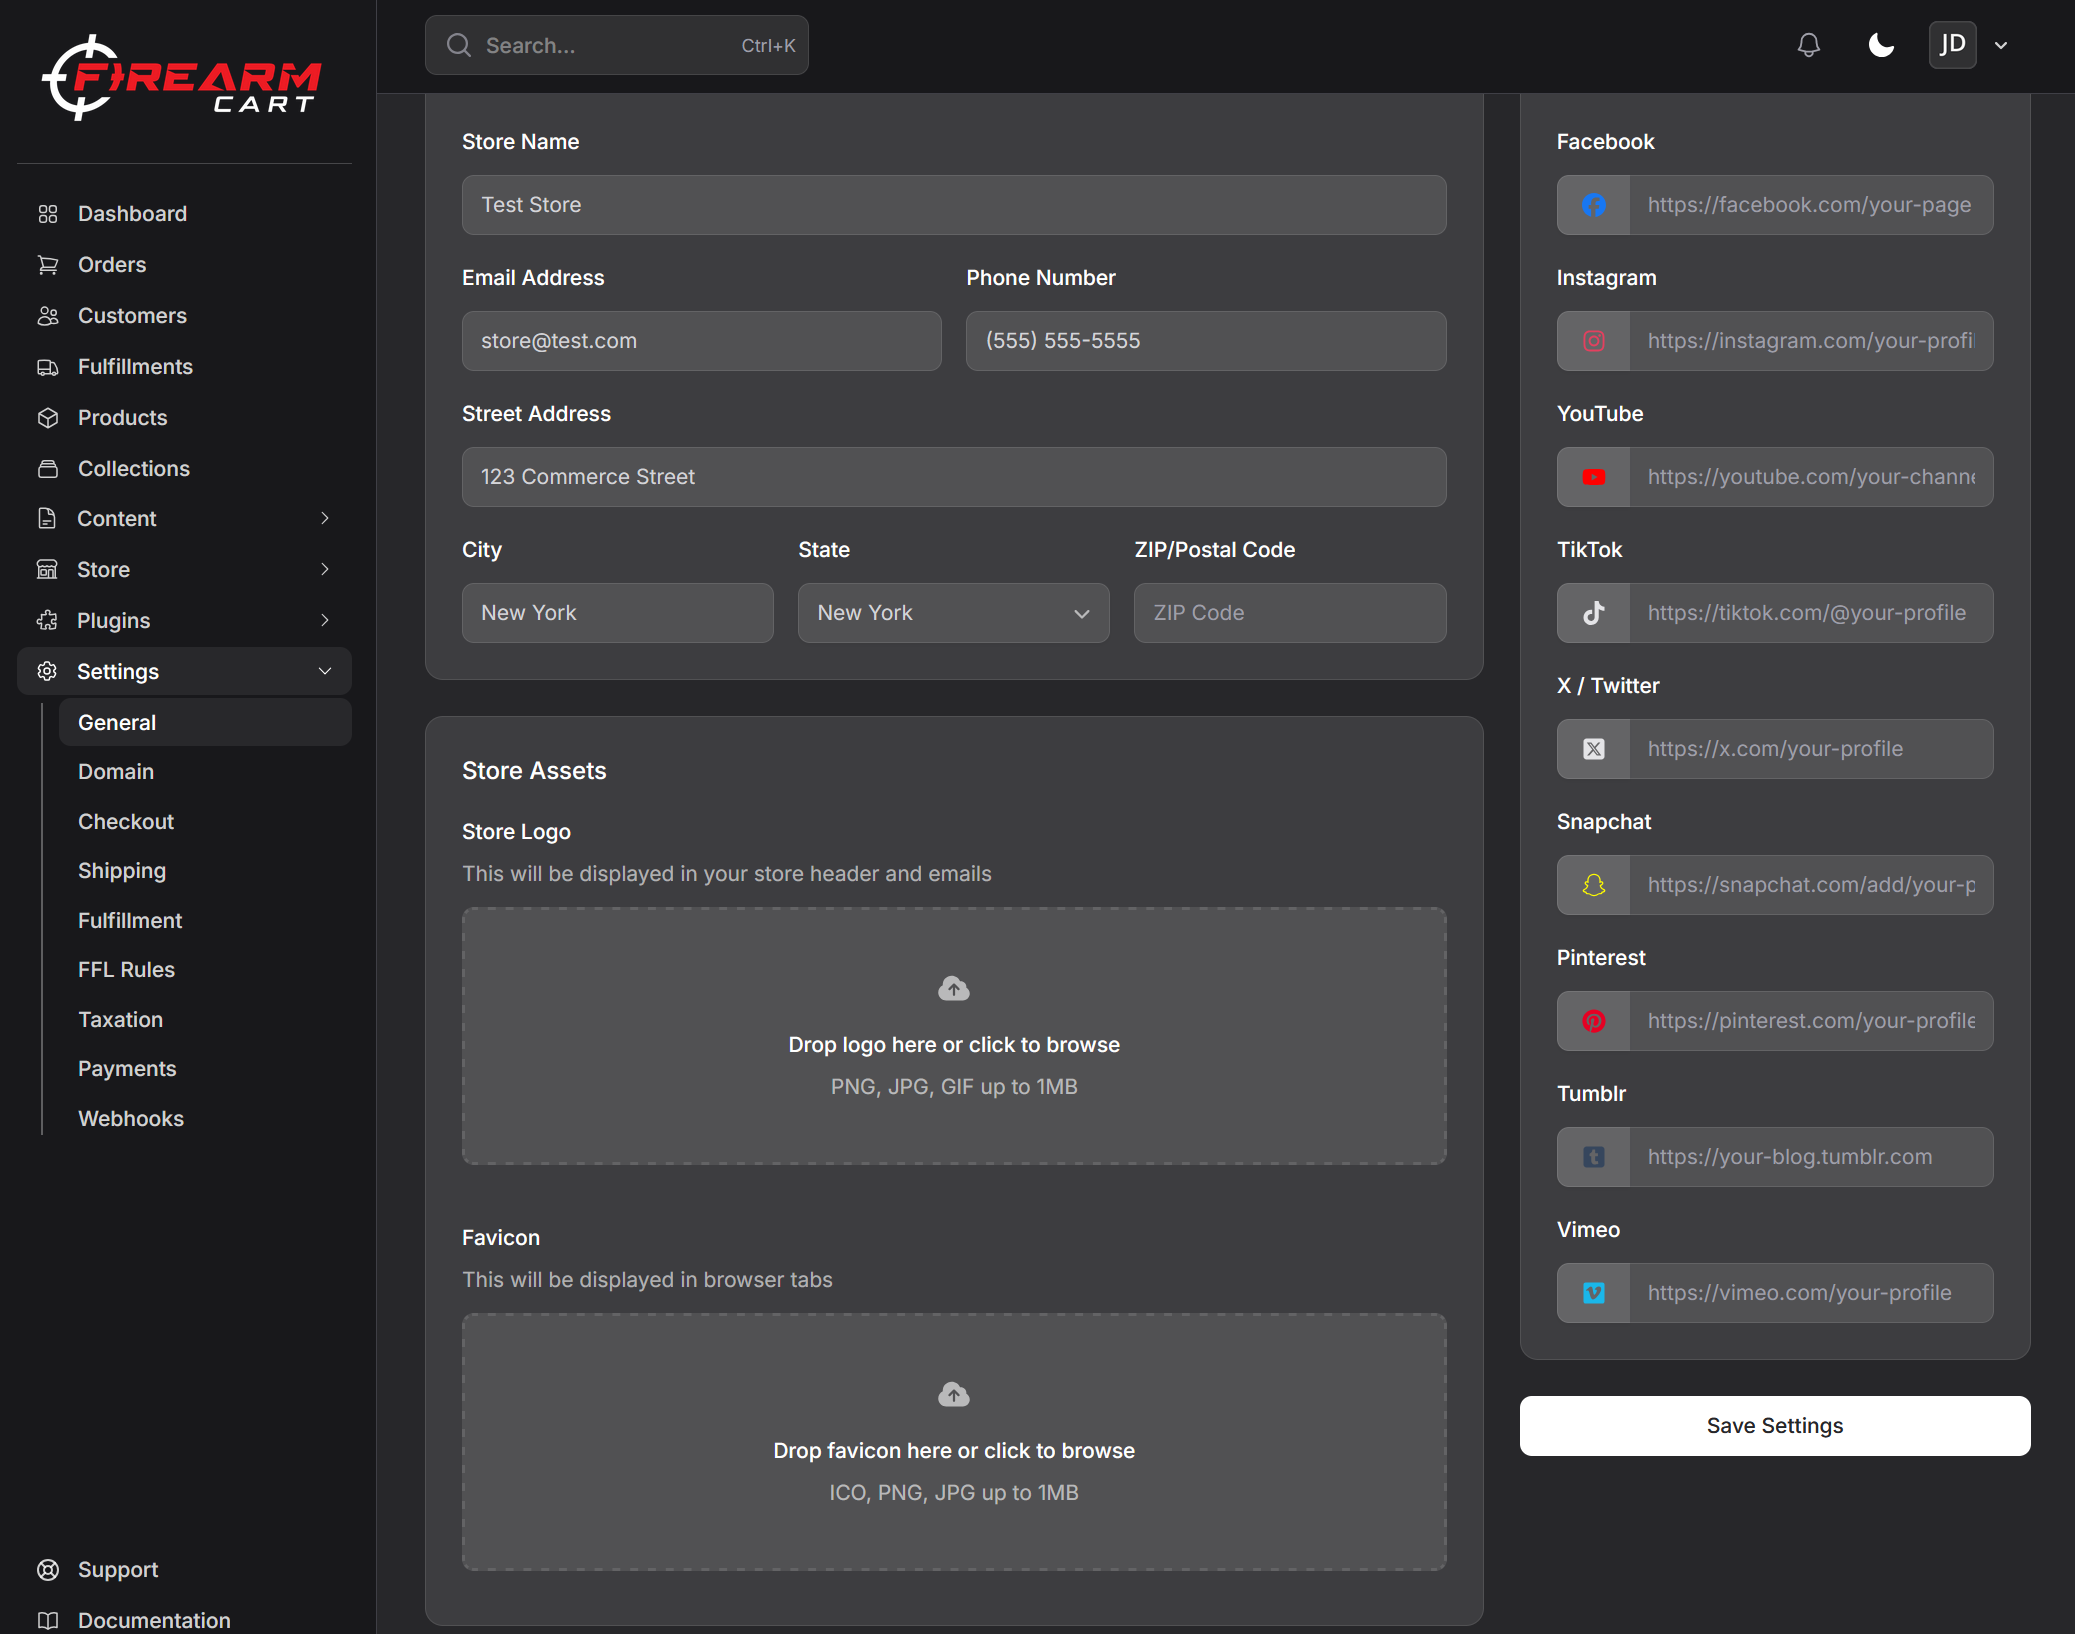
- From your dashboard, click Settings in the left sidebar
- Select General from the settings menu
Required Information
Business Details
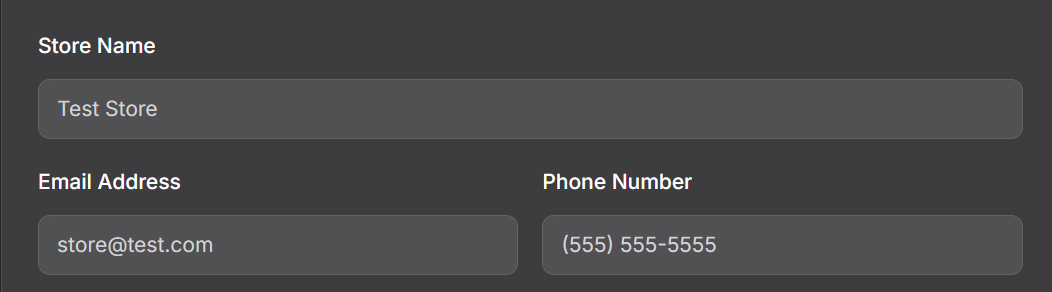
- Store name - Your business name as customers will see it
- Legal business name - Your registered business name (for invoices and legal documents)
- Store email - Primary contact email for customer inquiries
- Store phone - Customer service phone number
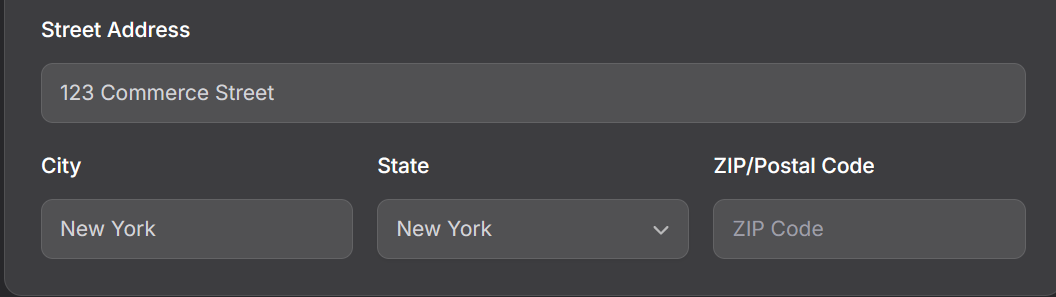
Business Address Your physical business address is required for:
- Shipping calculations
- Tax compliance
- Customer trust and FFL verification
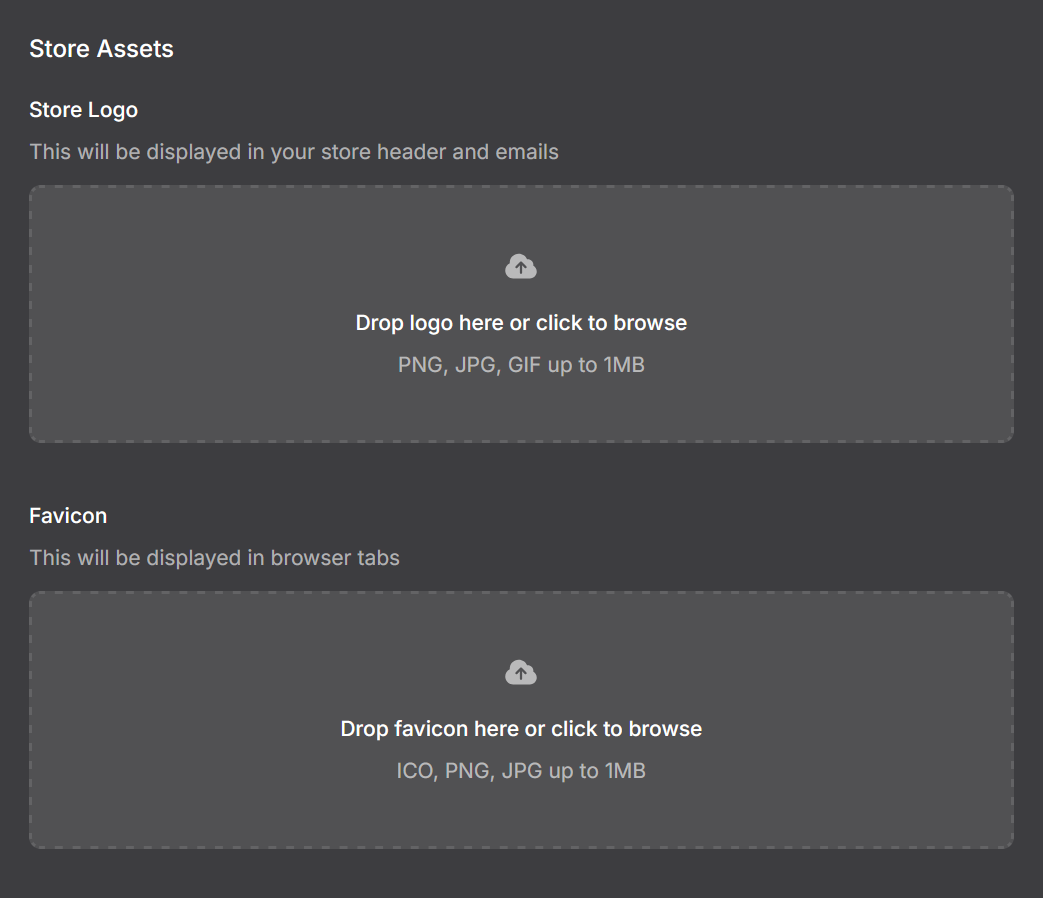
Store Logo Upload your logo in PNG or SVG format. Recommended dimensions:
- Primary logo: 400x100 pixels (displays in header)
- Square logo/favicon: 512x512 pixels (displays in browser tabs and mobile)
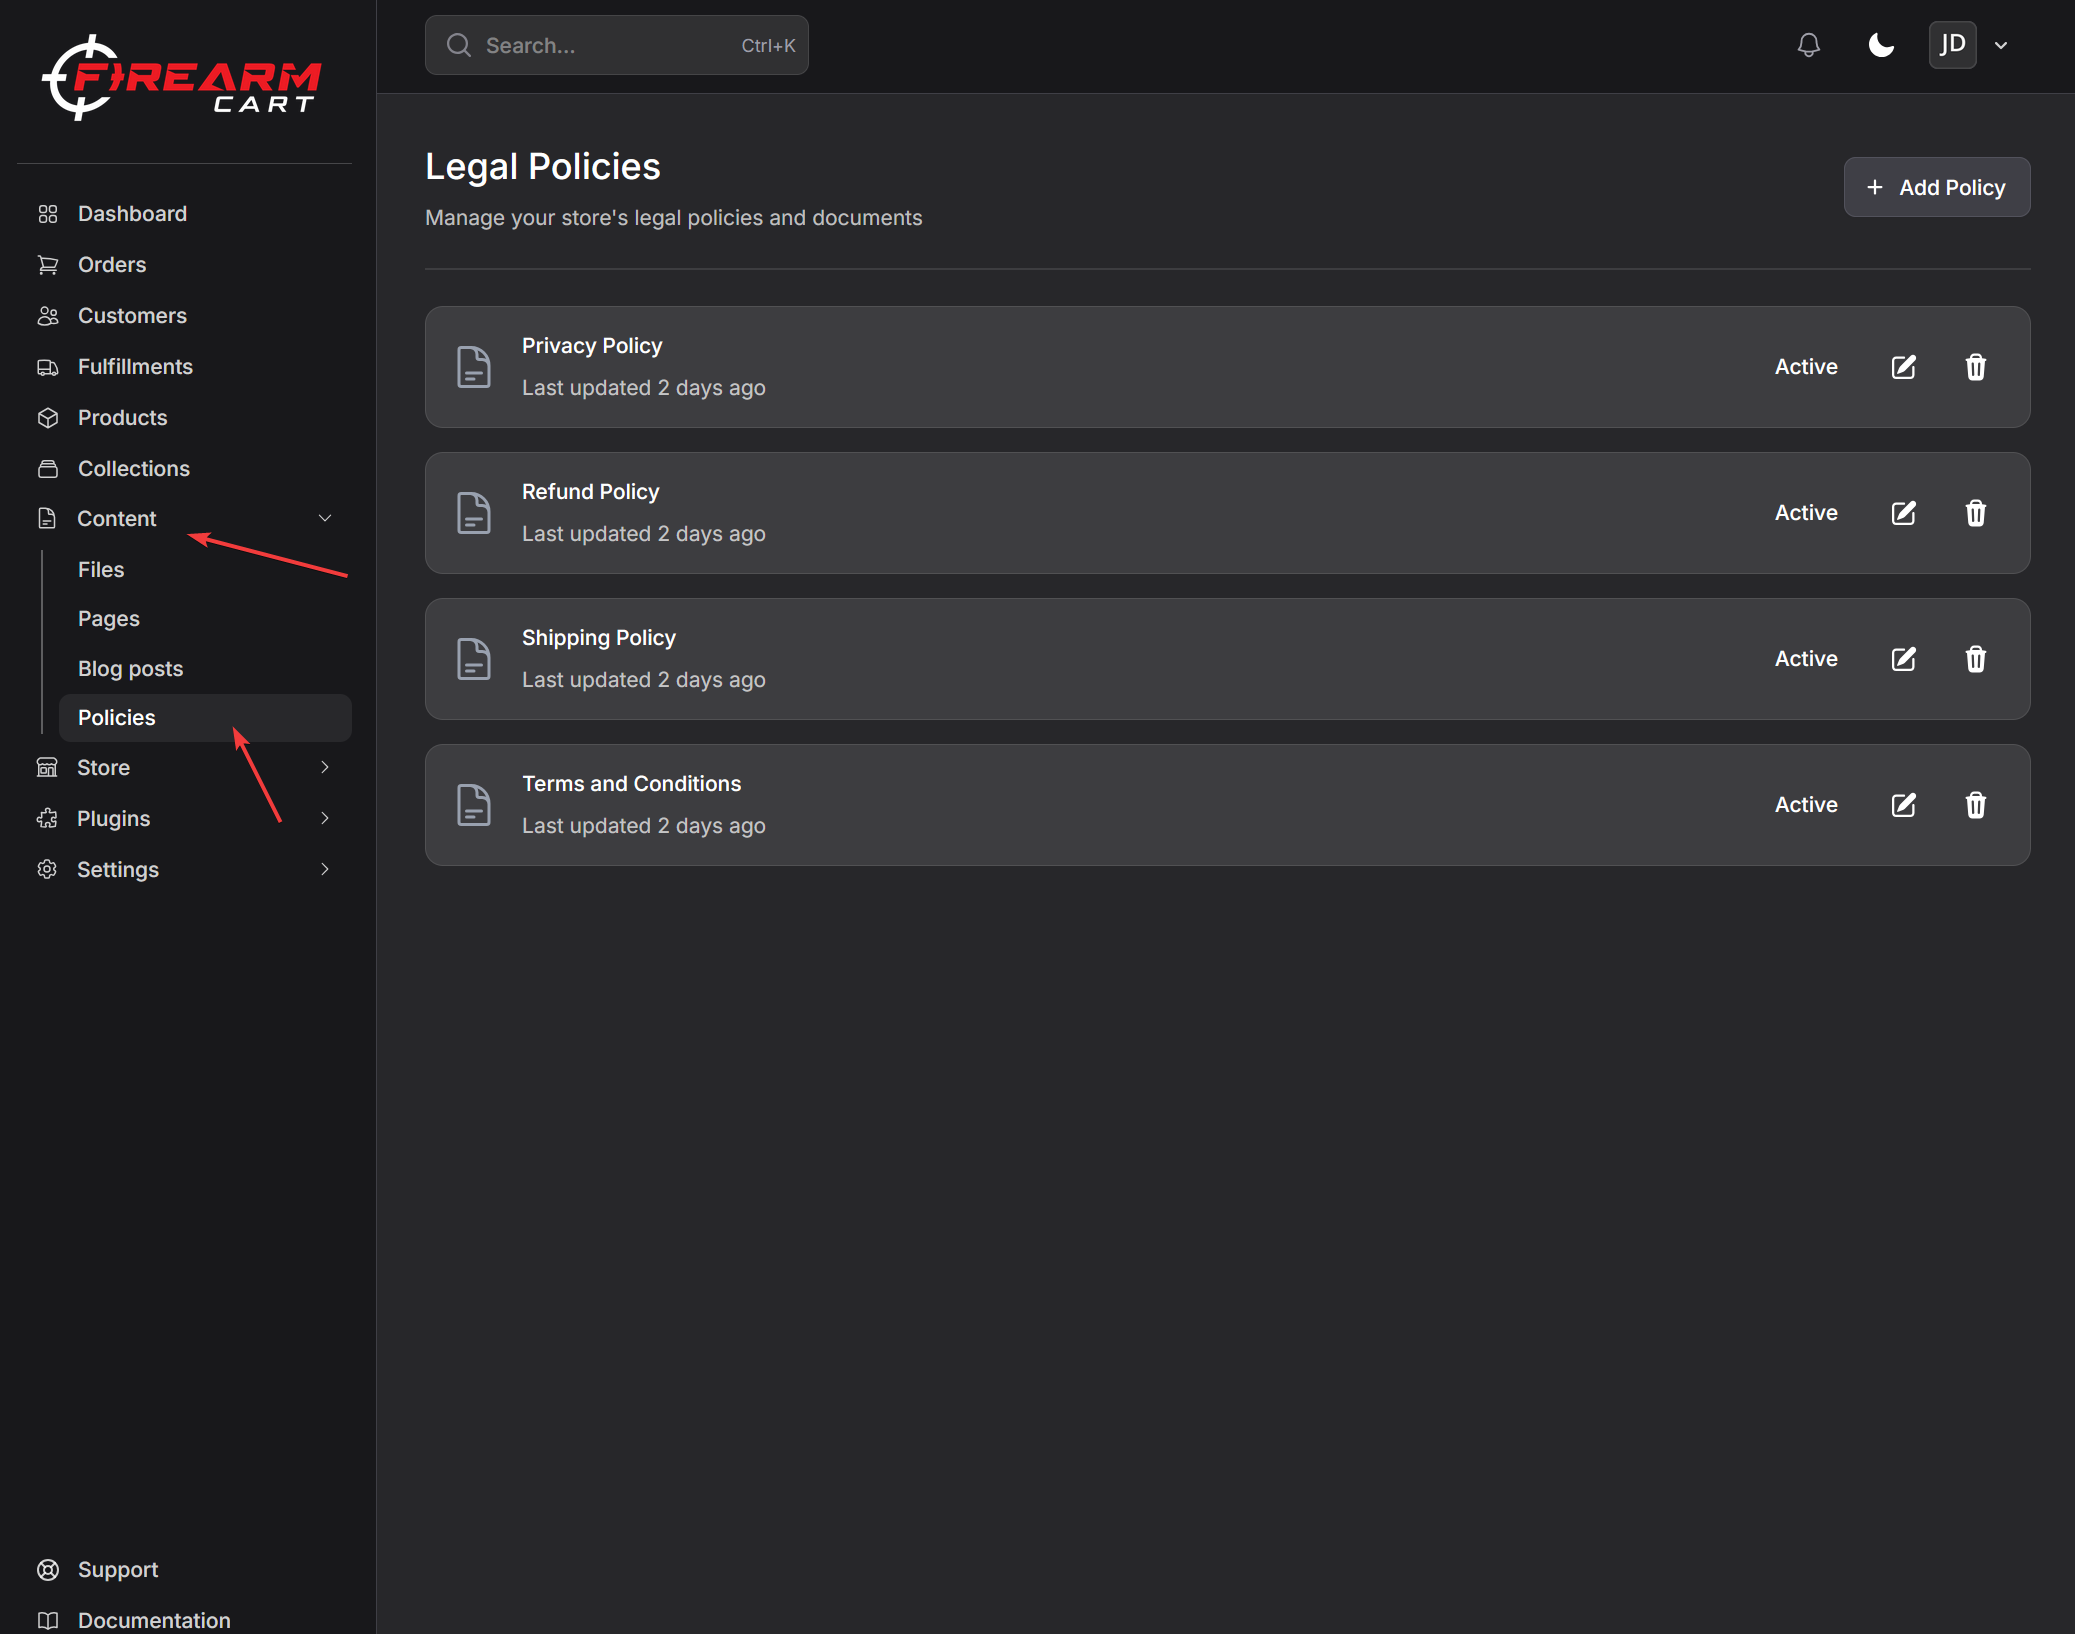
Store Policies
FirearmCart provides templates for essential policies. Navigate to Content > Policies to customize:
- Privacy Policy - How you collect and use customer data
- Terms of Service - Rules for using your store
- Shipping Policy - Delivery timeframes and procedures
- Return Policy - How you handle returns and exchanges
- FFL Transfer Policy - Firearm transfer requirements and procedures (not created by default)
Tip: Take time to customize these policies. For firearms retailers, clear FFL transfer policies help set customer expectations and reduce support inquiries.
Learn more about Store Information
Step 2: Payment Provider
FirearmCart partners with payment processors that specialize in firearm industry merchants. Unlike mainstream processors, these partners understand your business and won't freeze your account.
Supported Payment Processors
| Processor | Features | Best For |
|---|---|---|
| Fortis | Fast approval, competitive rates | Most FFL dealers |
| Authorize.Net | Established processor, robust API | High-volume stores |
| NMI | Flexible gateway, multiple bank options | Experienced merchants |
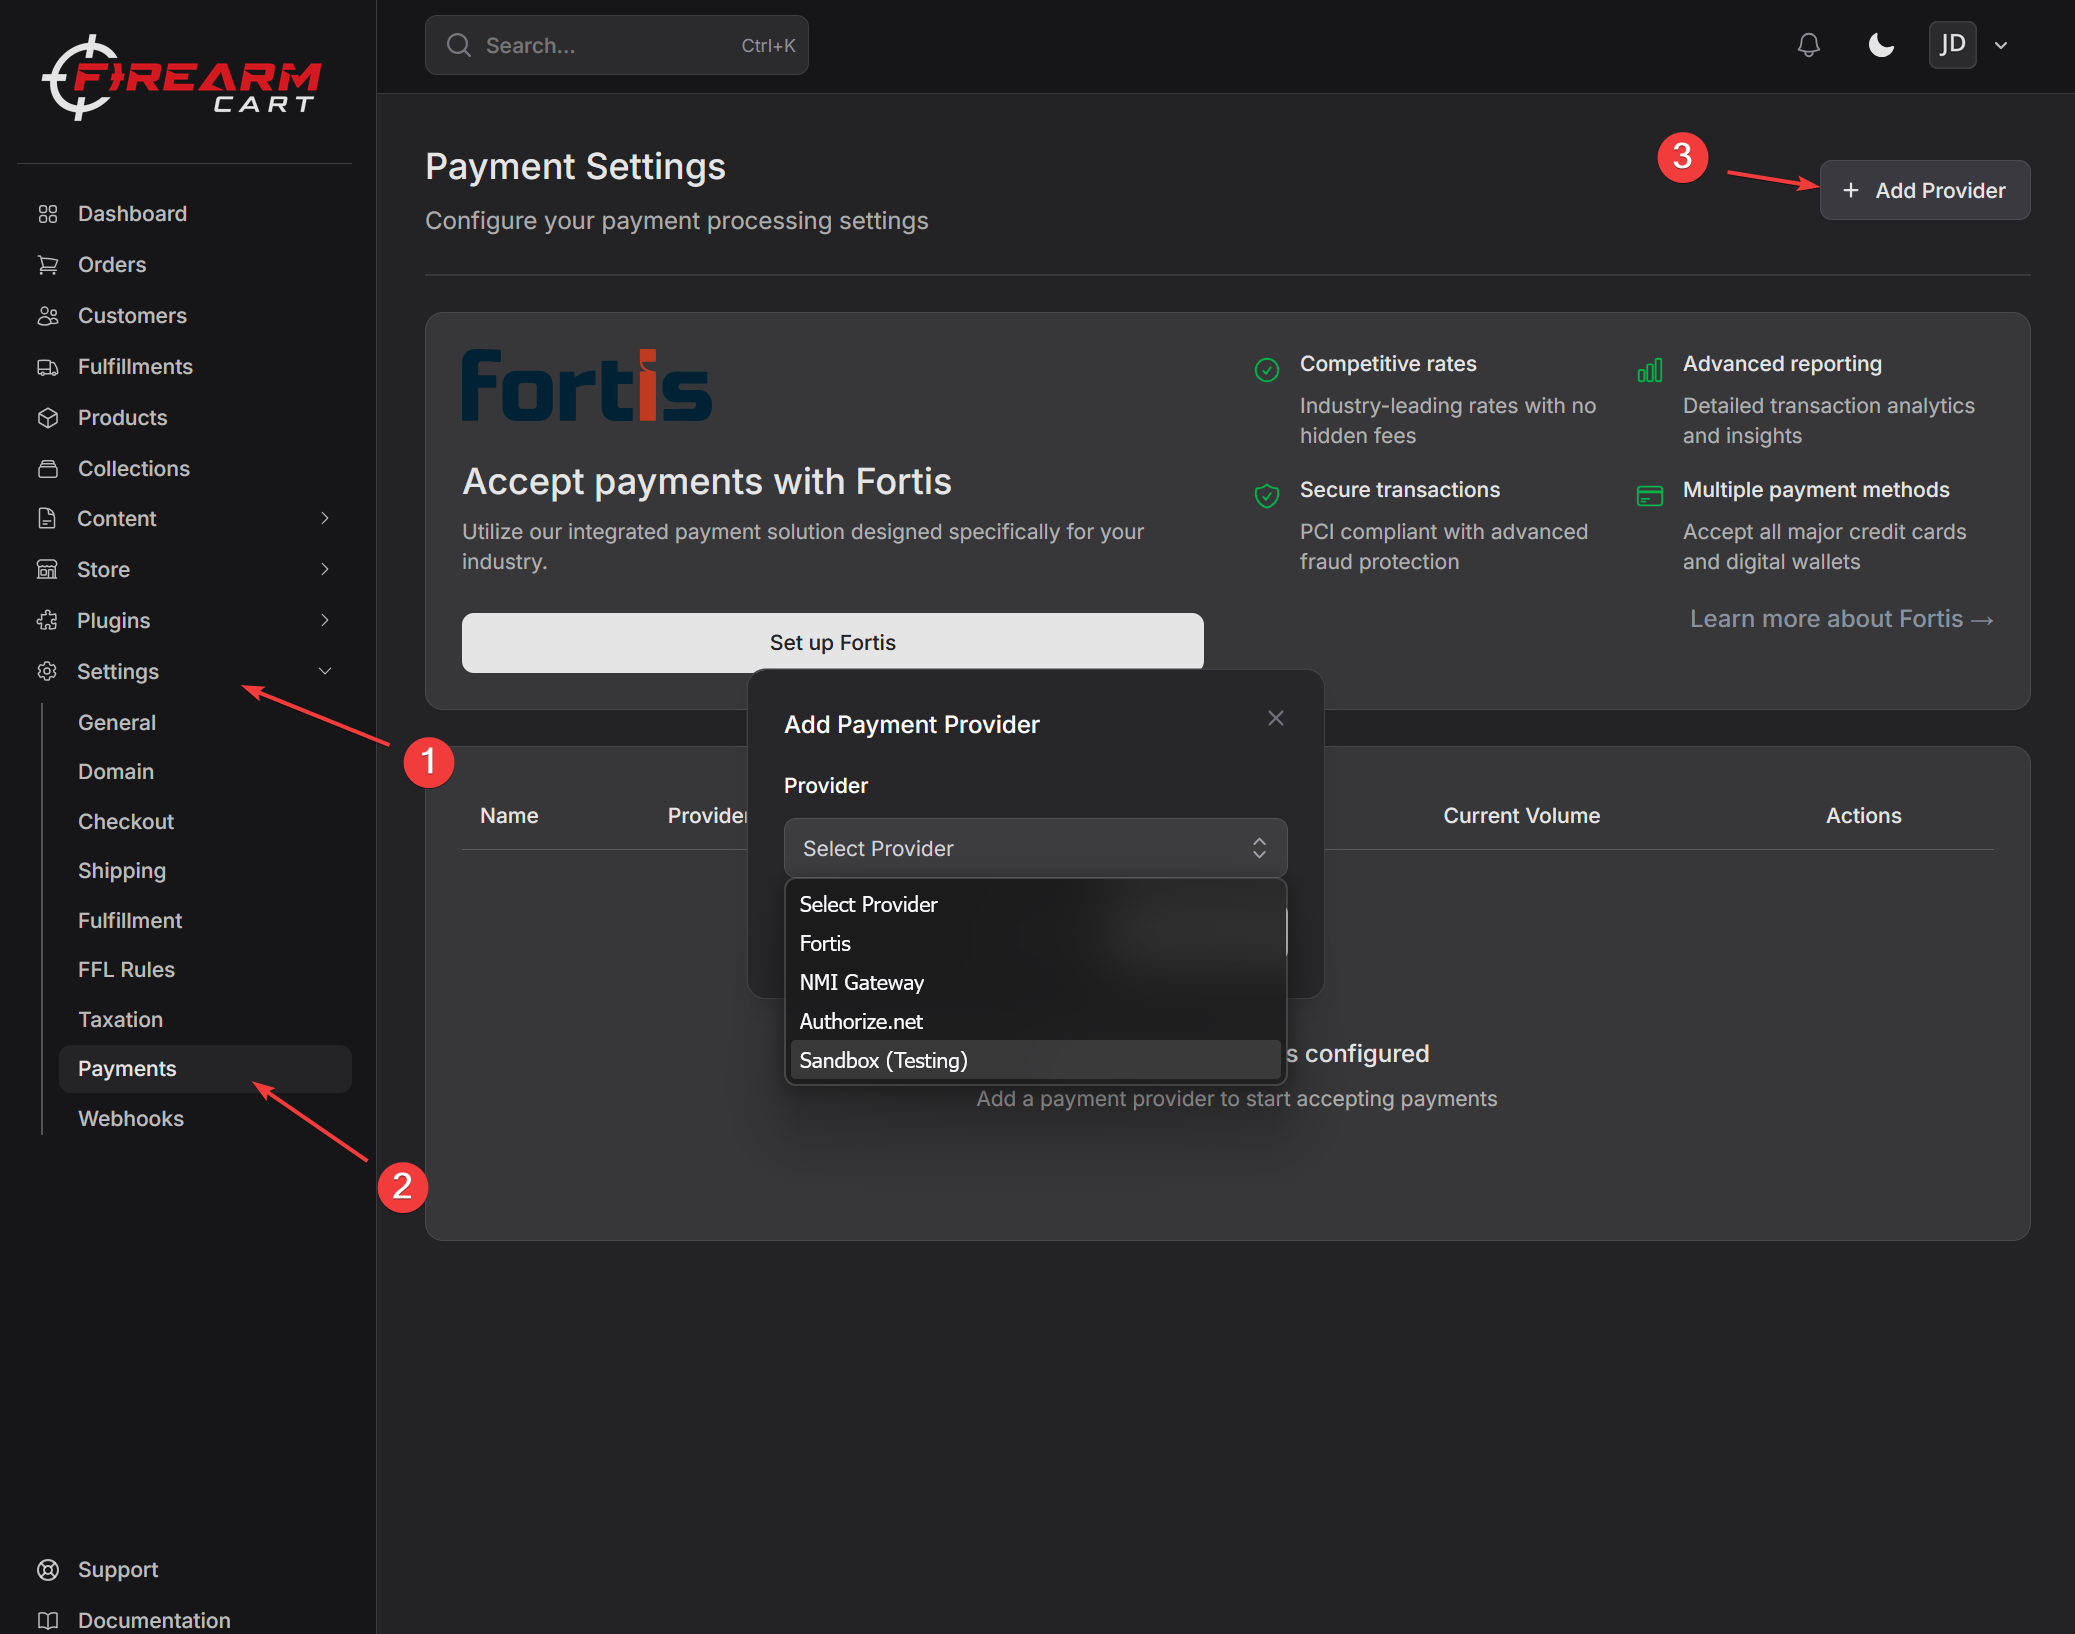
Connecting a Payment Processor
- Navigate to Settings > Payments
- Click Add Provider in the top right
- Select your provider and enter your details
- Click Add Provider
Testing Your Connection
After connecting, FirearmCart automatically runs a test transaction to verify your setup:
- Green checkmark - Connection successful, ready to accept payments
- Red X - Connection failed, check your credentials
Important: You'll need an approved merchant account with one of these processors before connecting. If you don't have one, contact the processor directly or reach out to FirearmCart support for referrals.
Learn more about Payment Providers
Step 3: Shipping Configuration
Proper shipping configuration is critical for firearm retailers. You need to handle both standard merchandise and regulated items like firearms and ammunition.
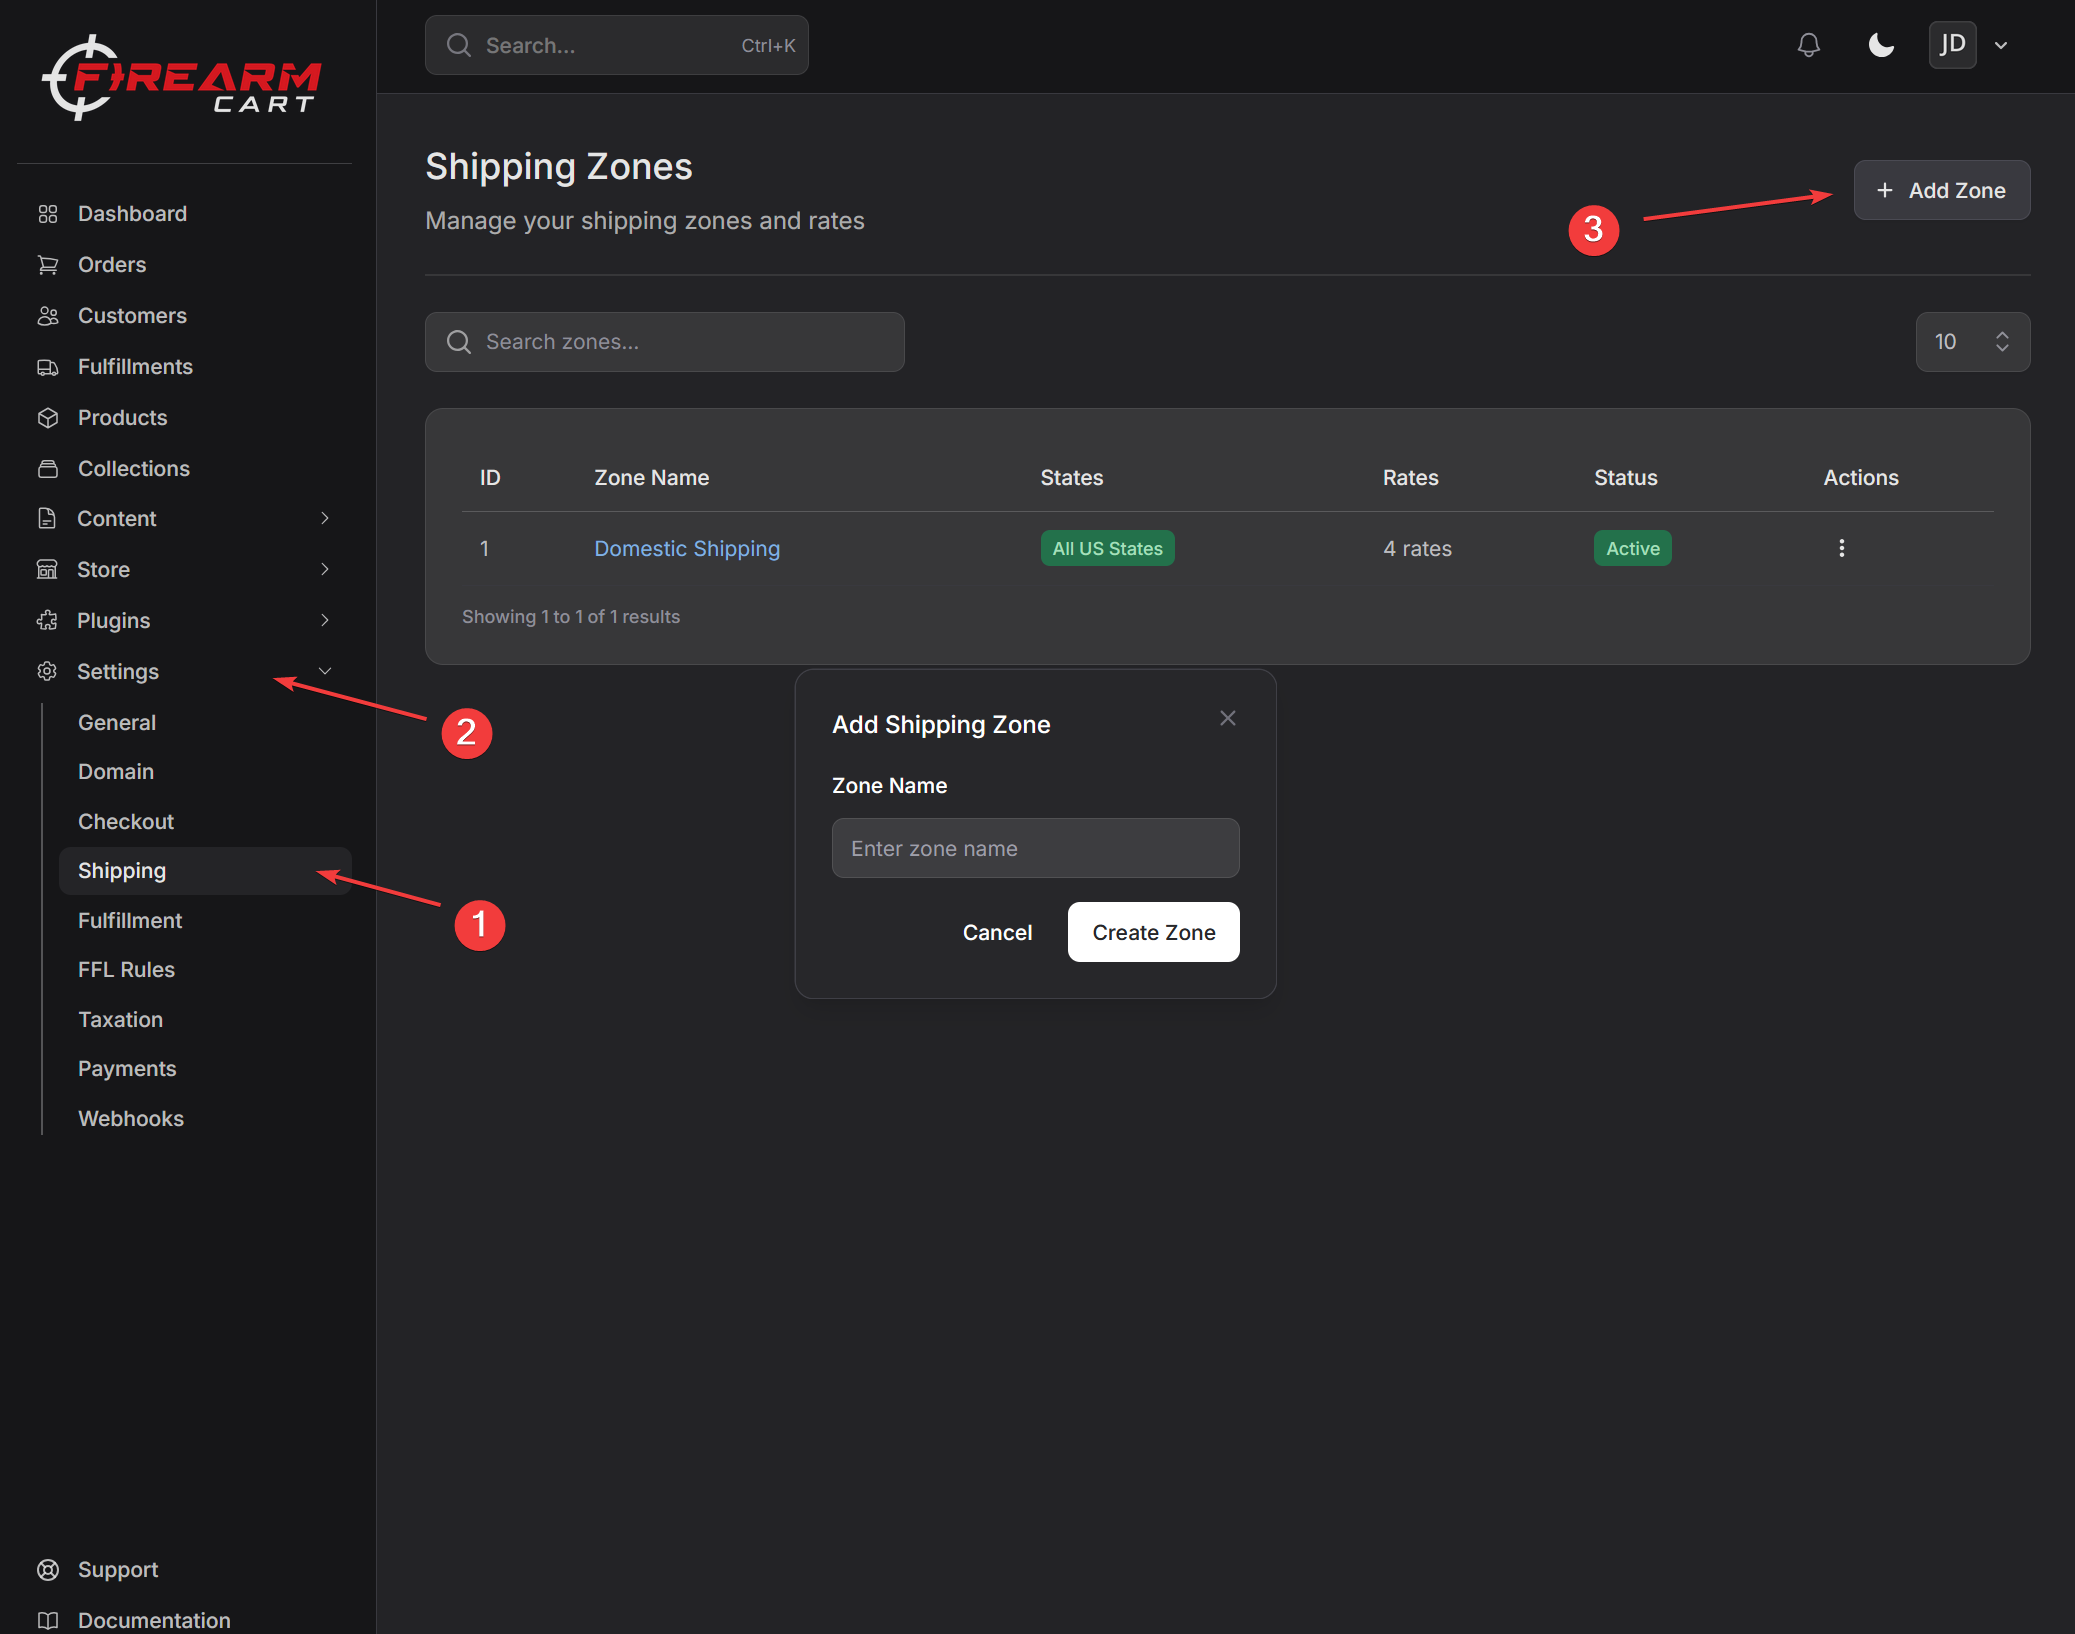
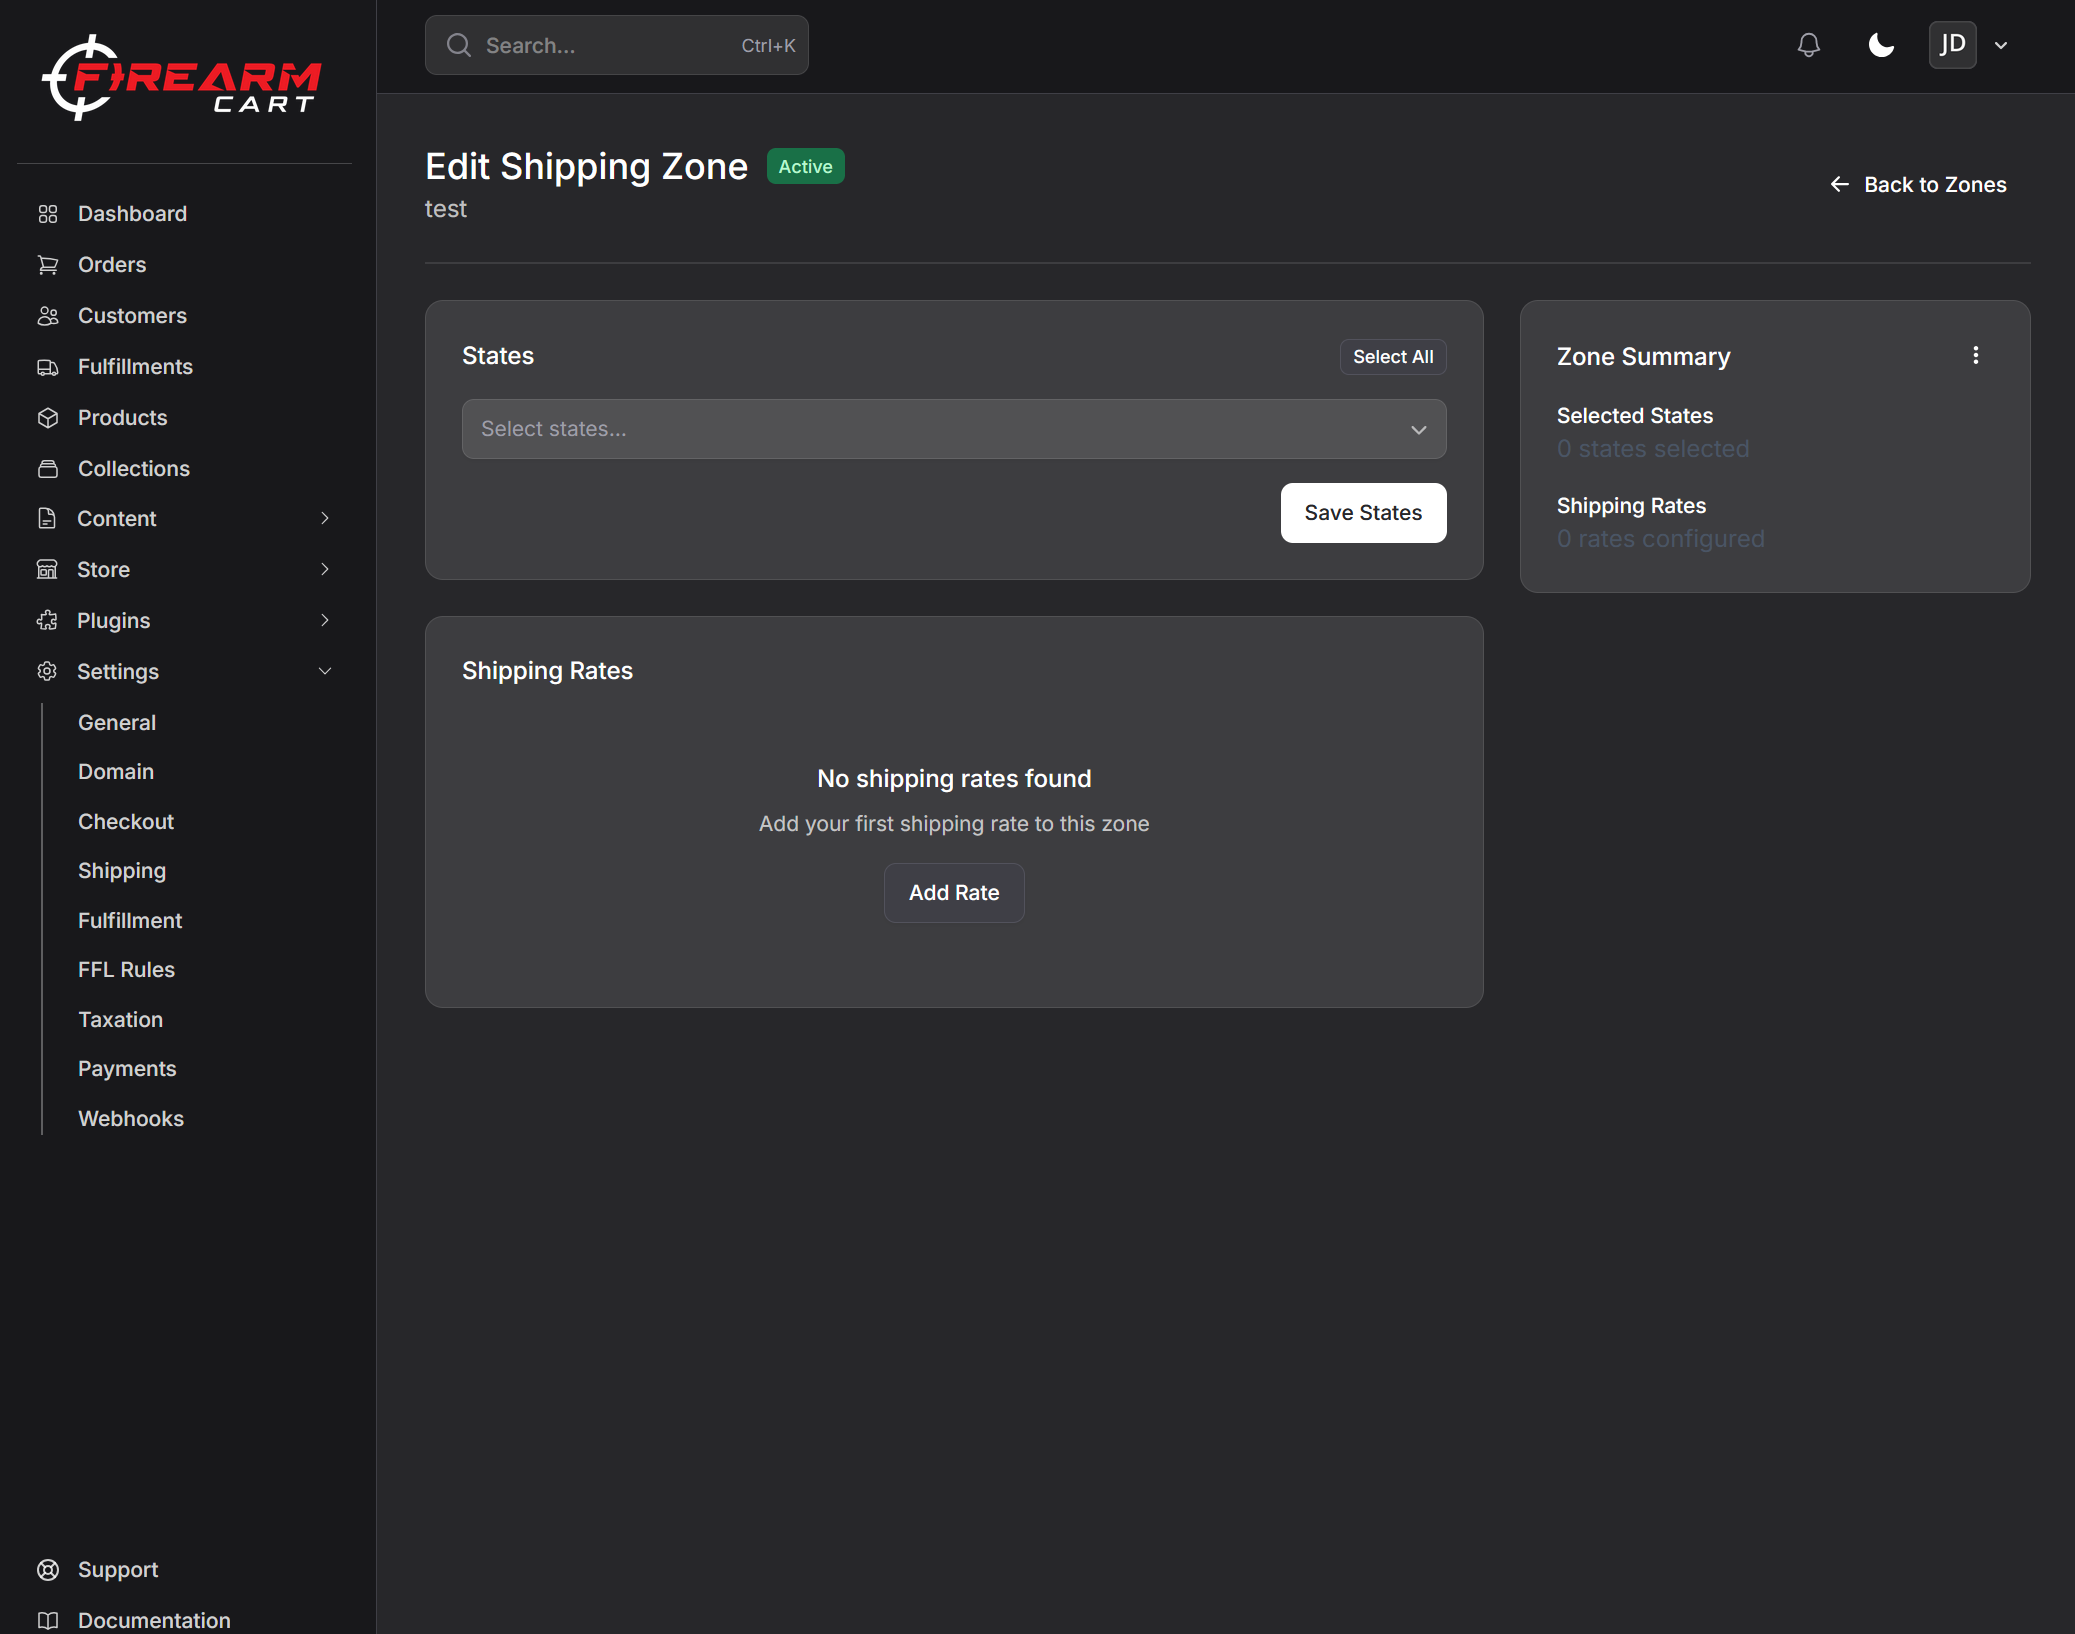
Shipping Zones
Shipping zones let you define rates based on customer location:
- Navigate to Settings > Shipping
- Click Add zone
- Name your zone and click Create Zone
- Add states and shipping rates for the zone.
Example Zone Setup
| Zone Name | States | Flat Rate | Free Shipping Threshold |
|---|---|---|---|
| Local | Your state | $8.00 | $150+ |
| Regional | Neighboring states | $12.00 | $200+ |
| National | All other states | $15.00 | $300+ |
| Restricted | CA, NY, etc. | Custom rules | - |
Firearm Shipping Requirements
Step 4: Add Products
Your product catalog is the heart of your store. FirearmCart makes it easy to add products with all the details firearm buyers expect.
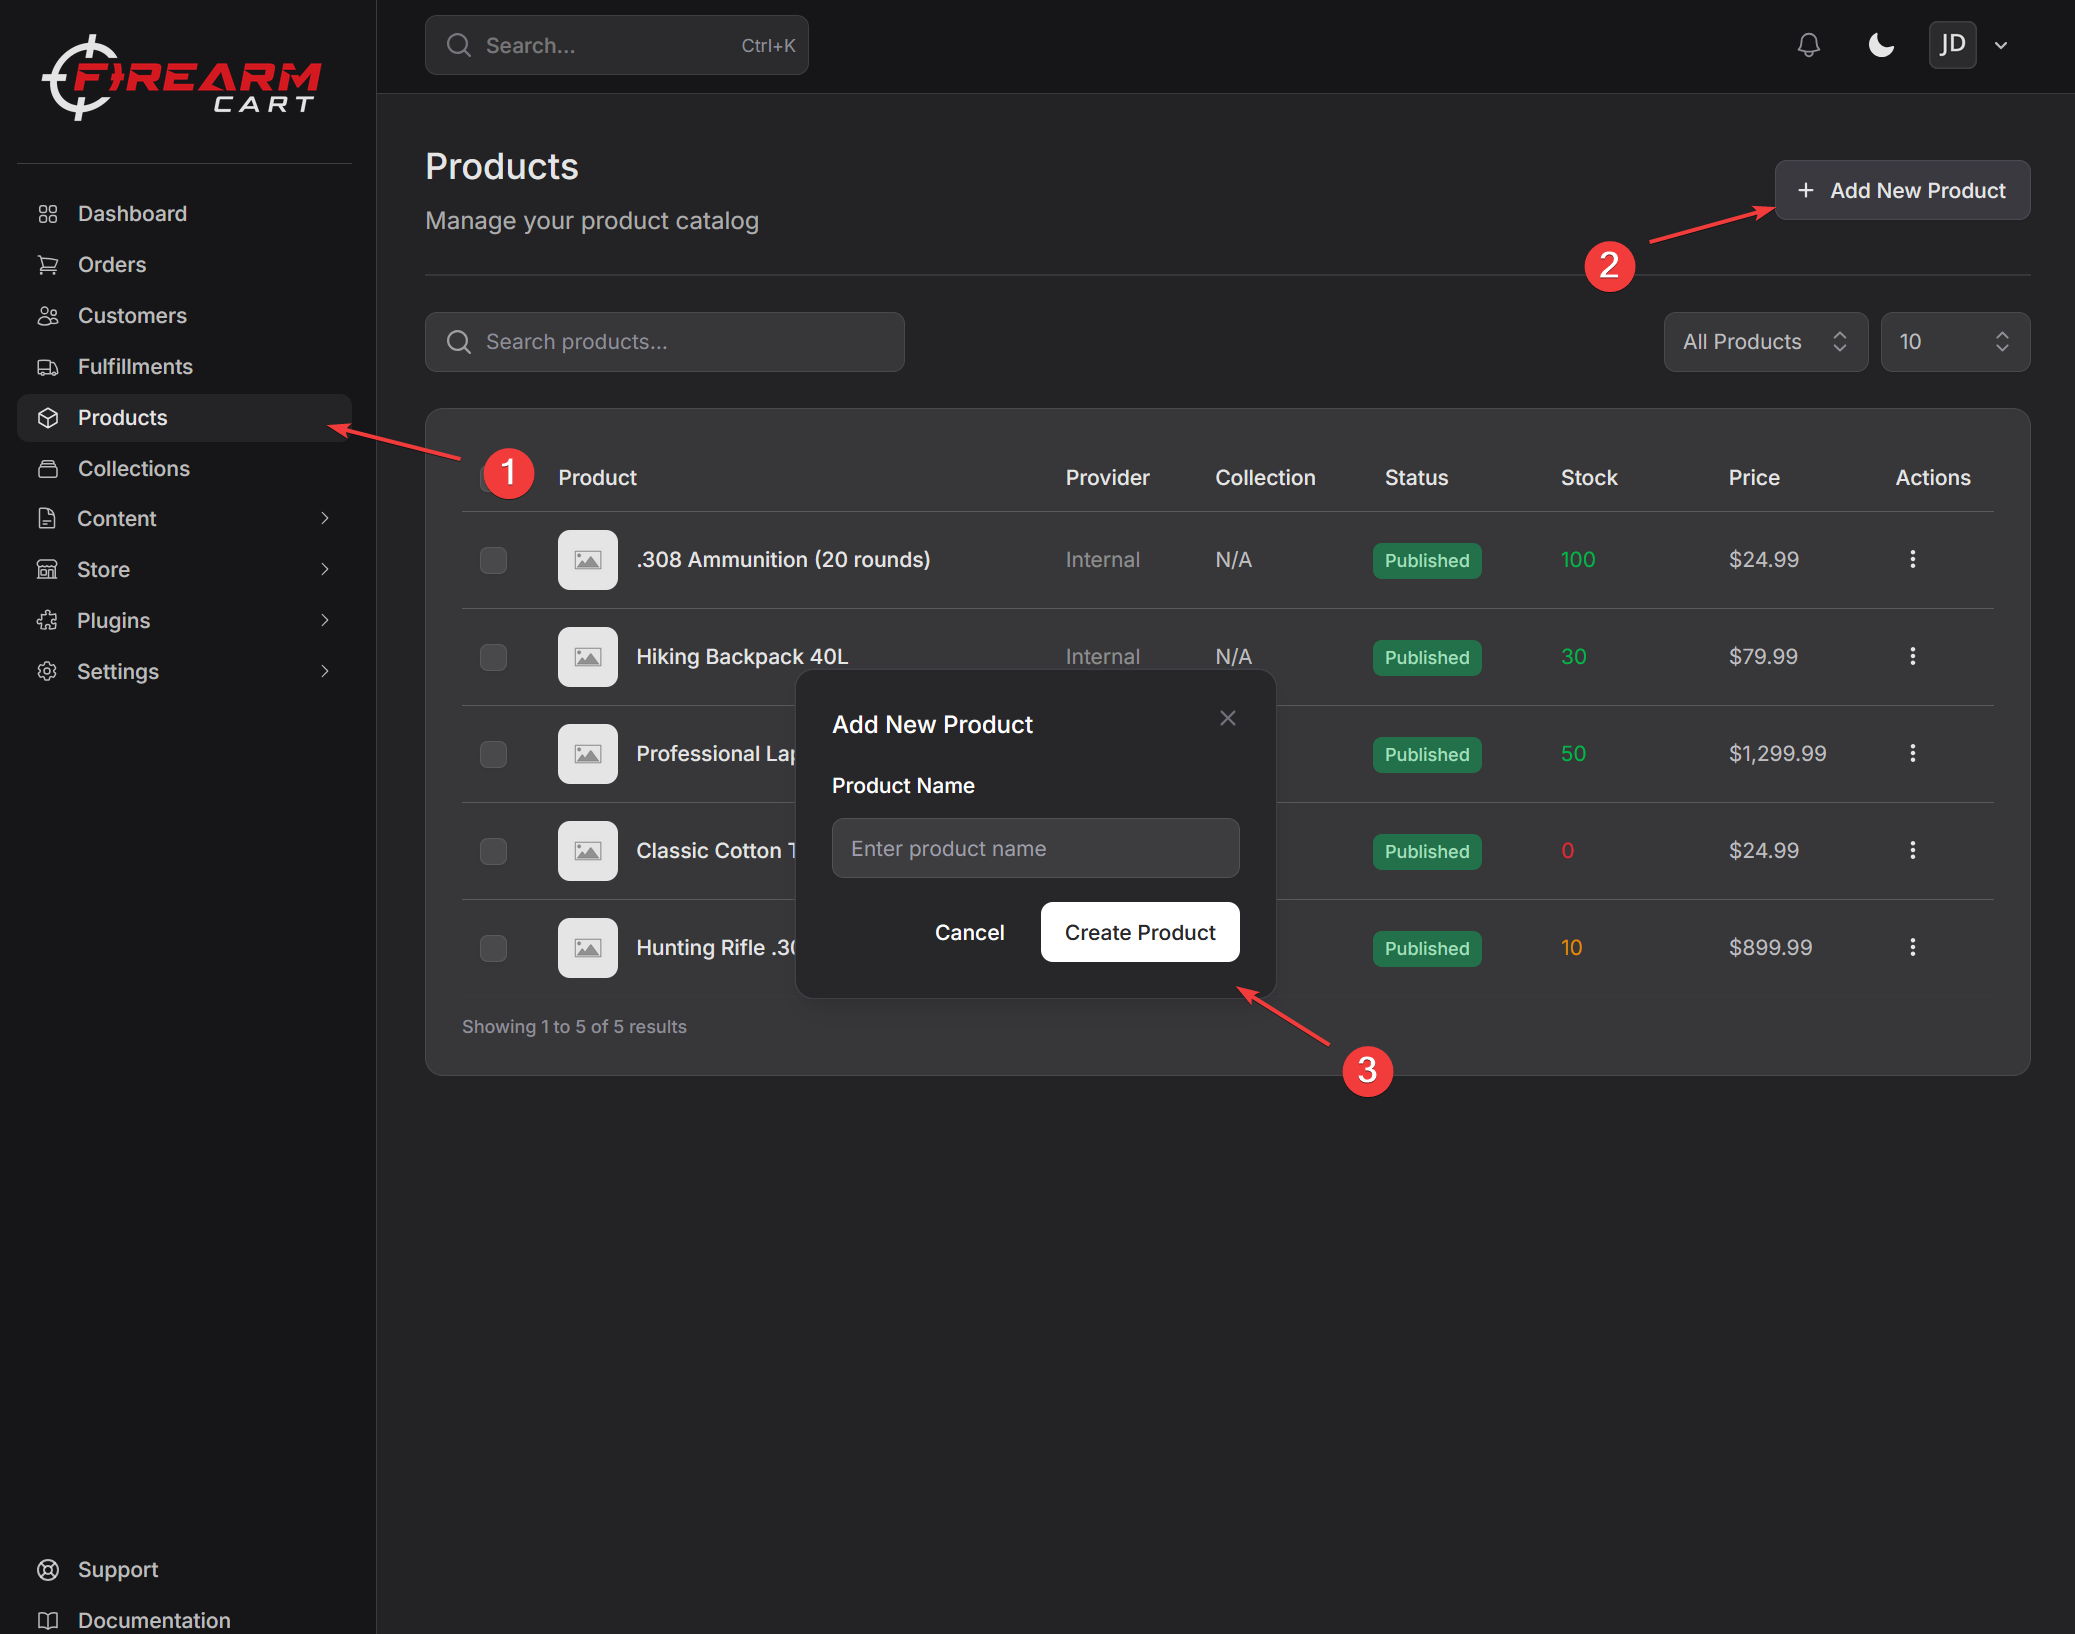
Adding Your First Product
- Navigate to Products in the sidebar
- Click Add New Product
- Give your product a name
- Click Create Product
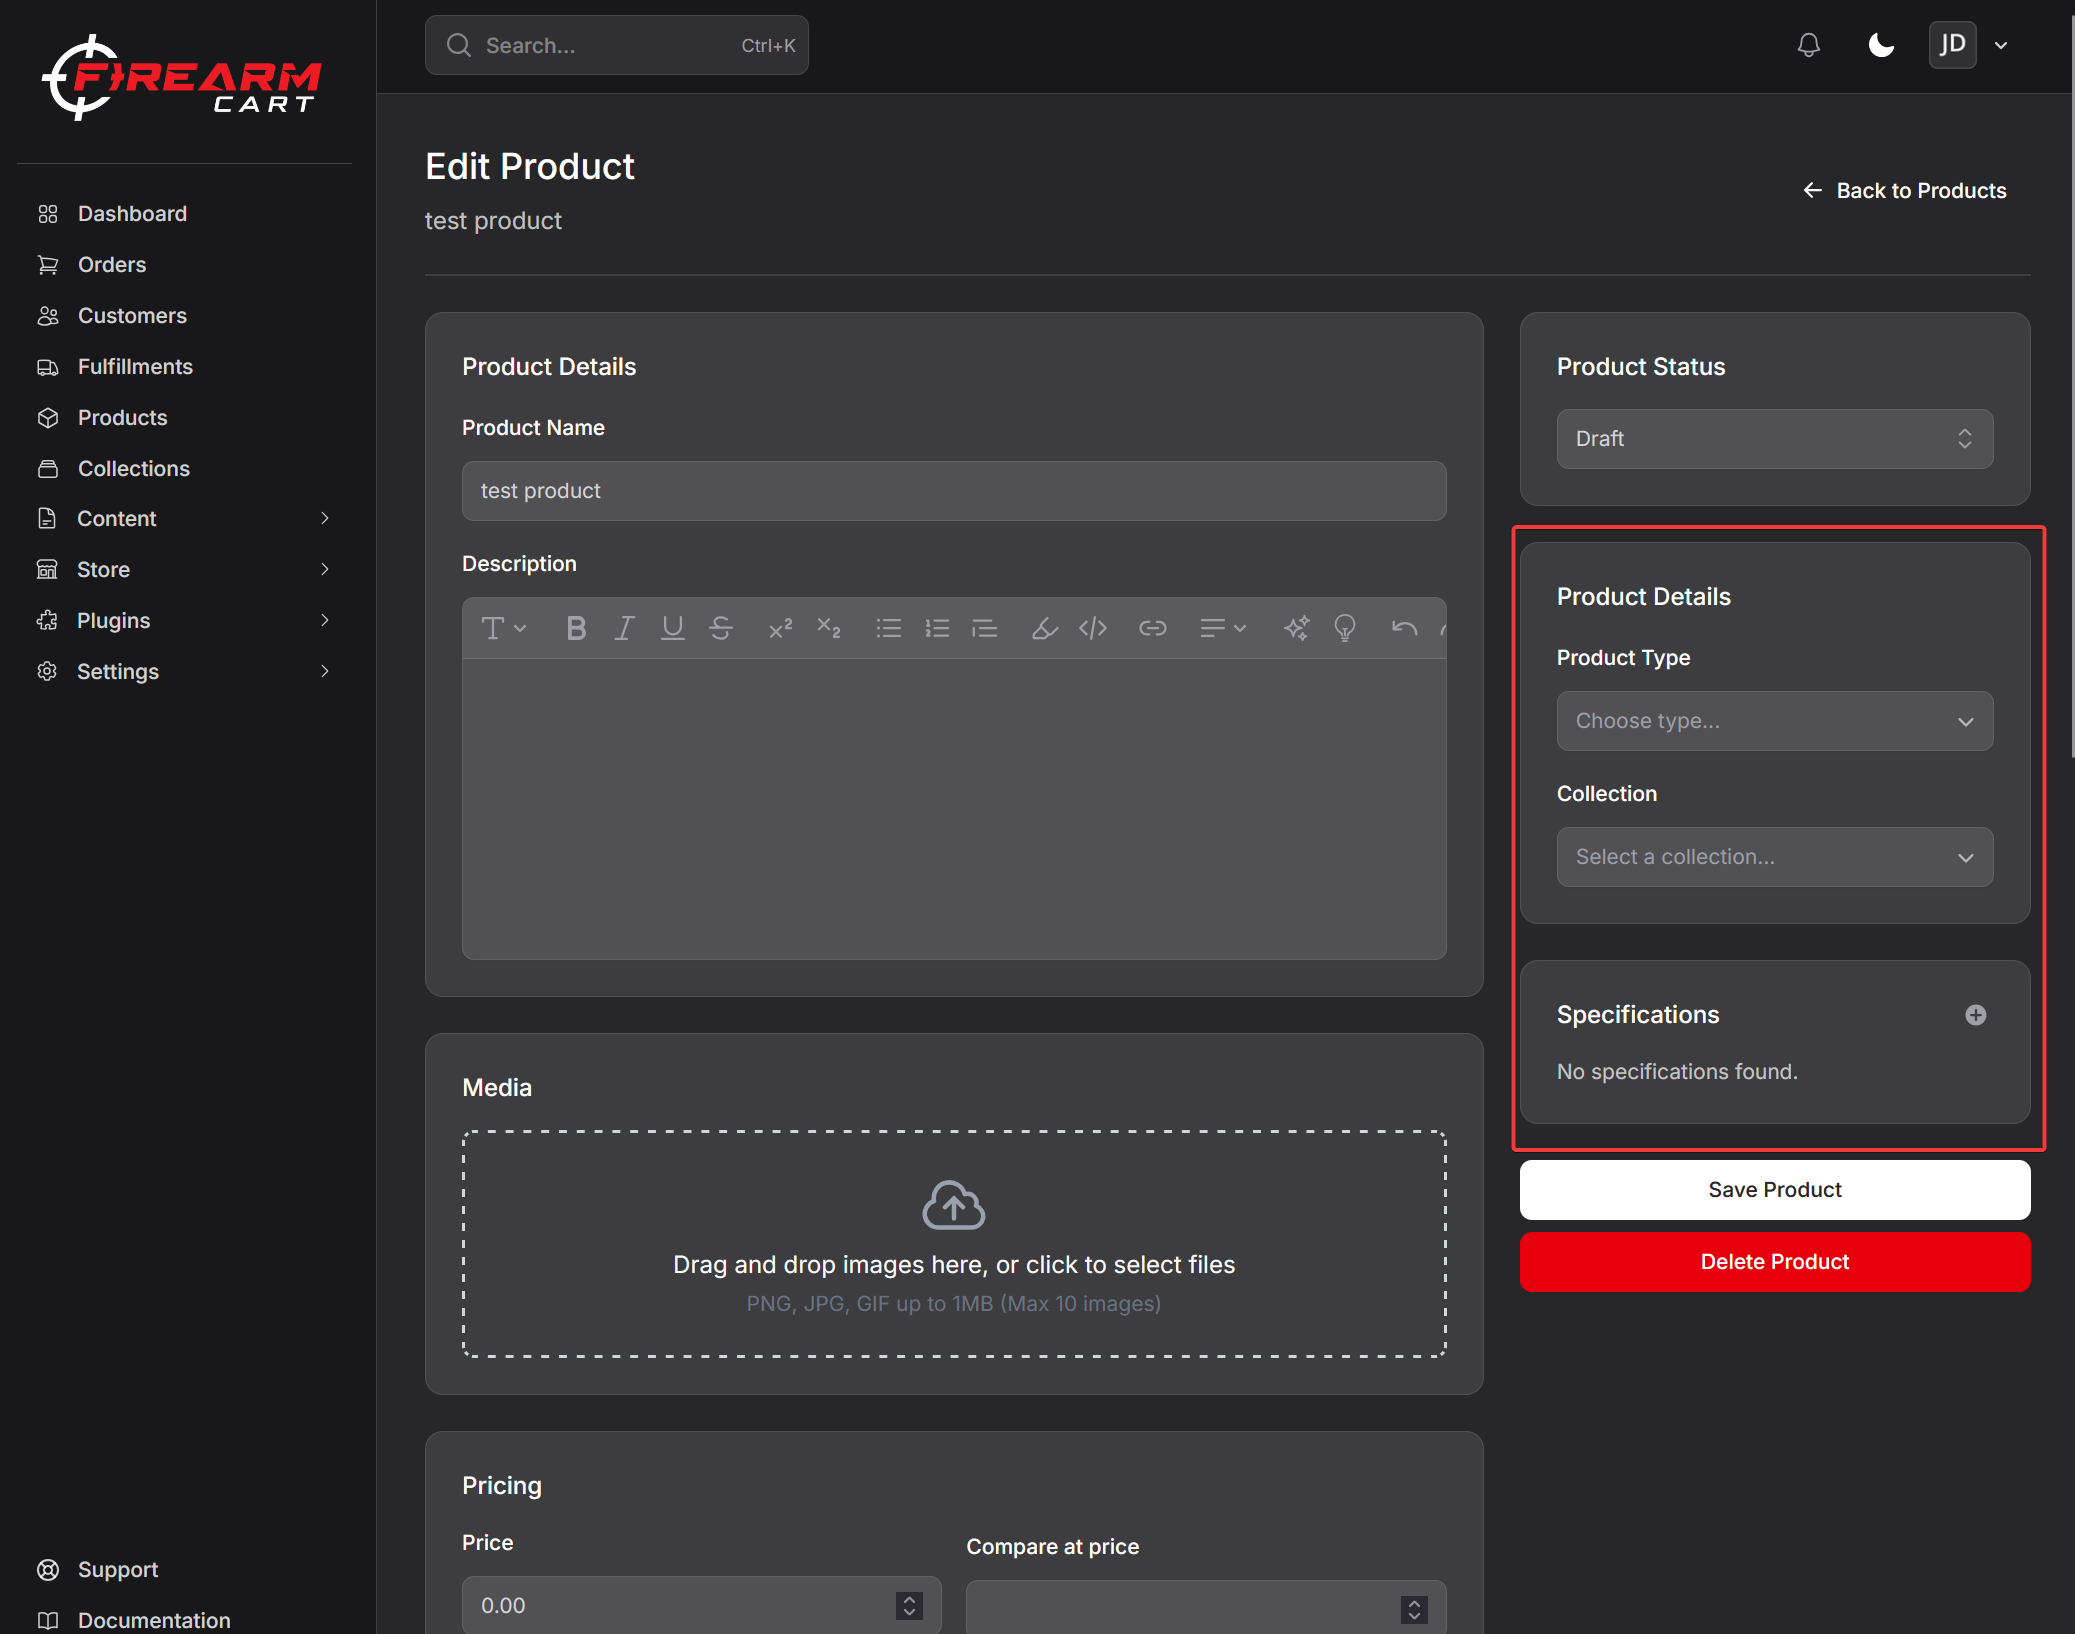
Product Information
Basic Details
- Product Name - Product name (e.g., "Glock 19 Gen 5 9mm")
- Description - Detailed product description with features
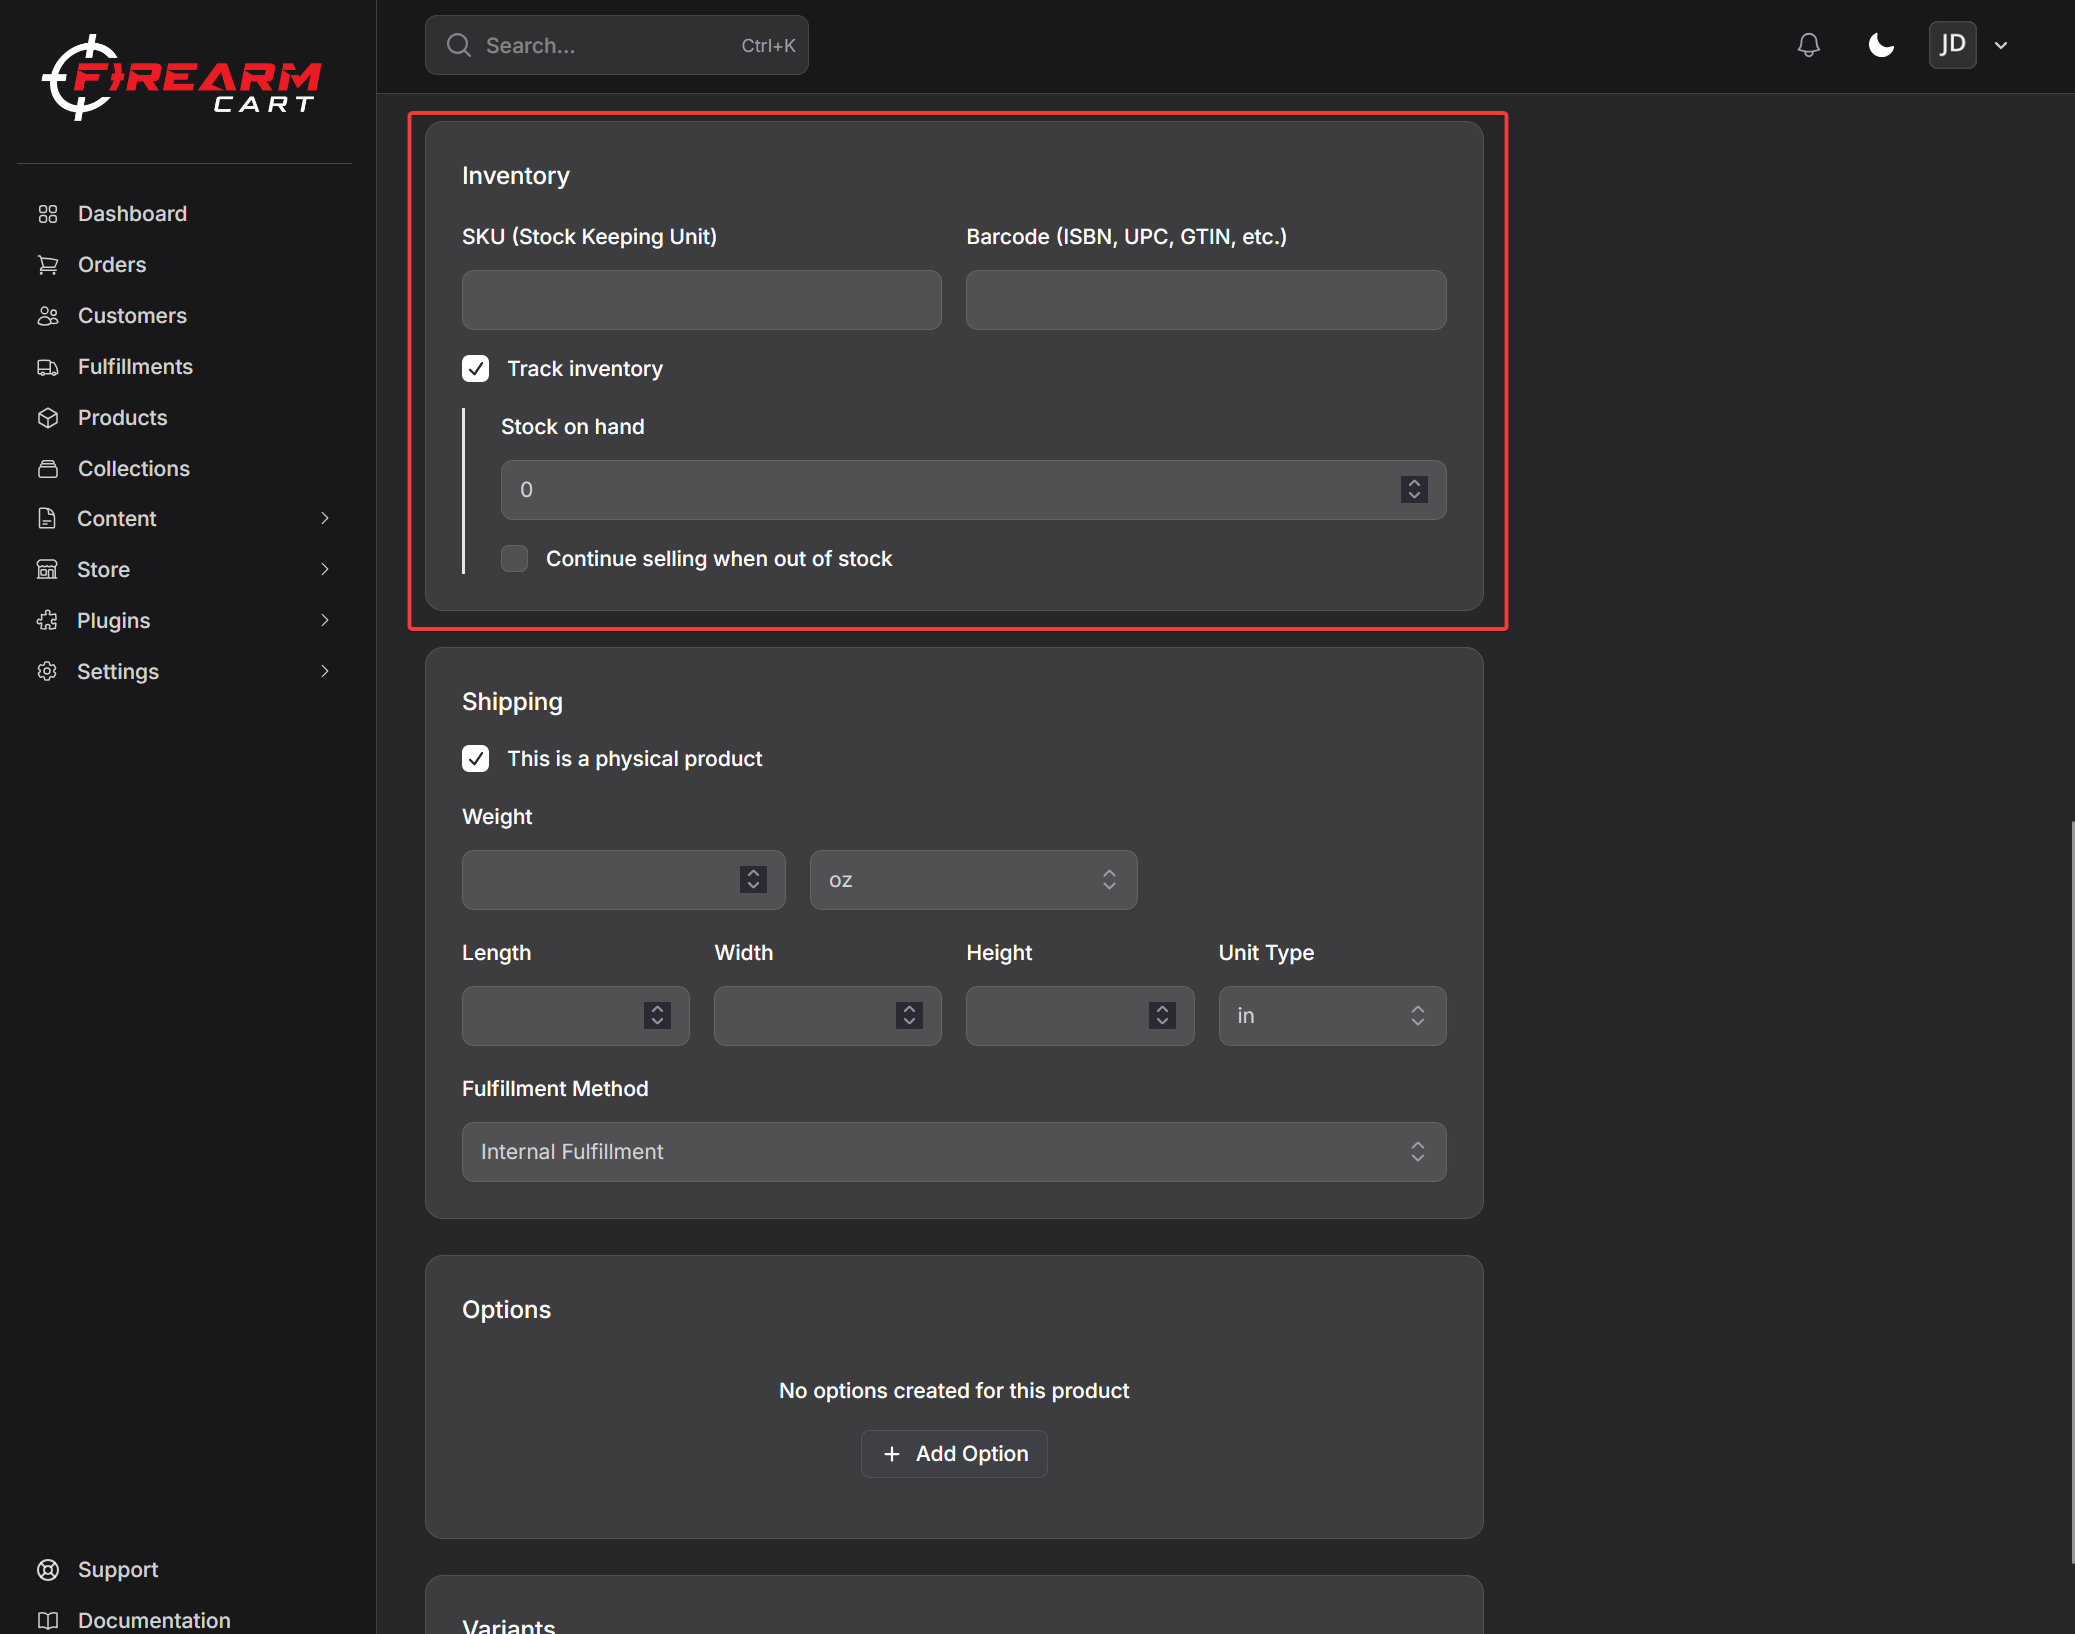
- SKU - Your internal product code
- Barcode - UPC/EAN for inventory management
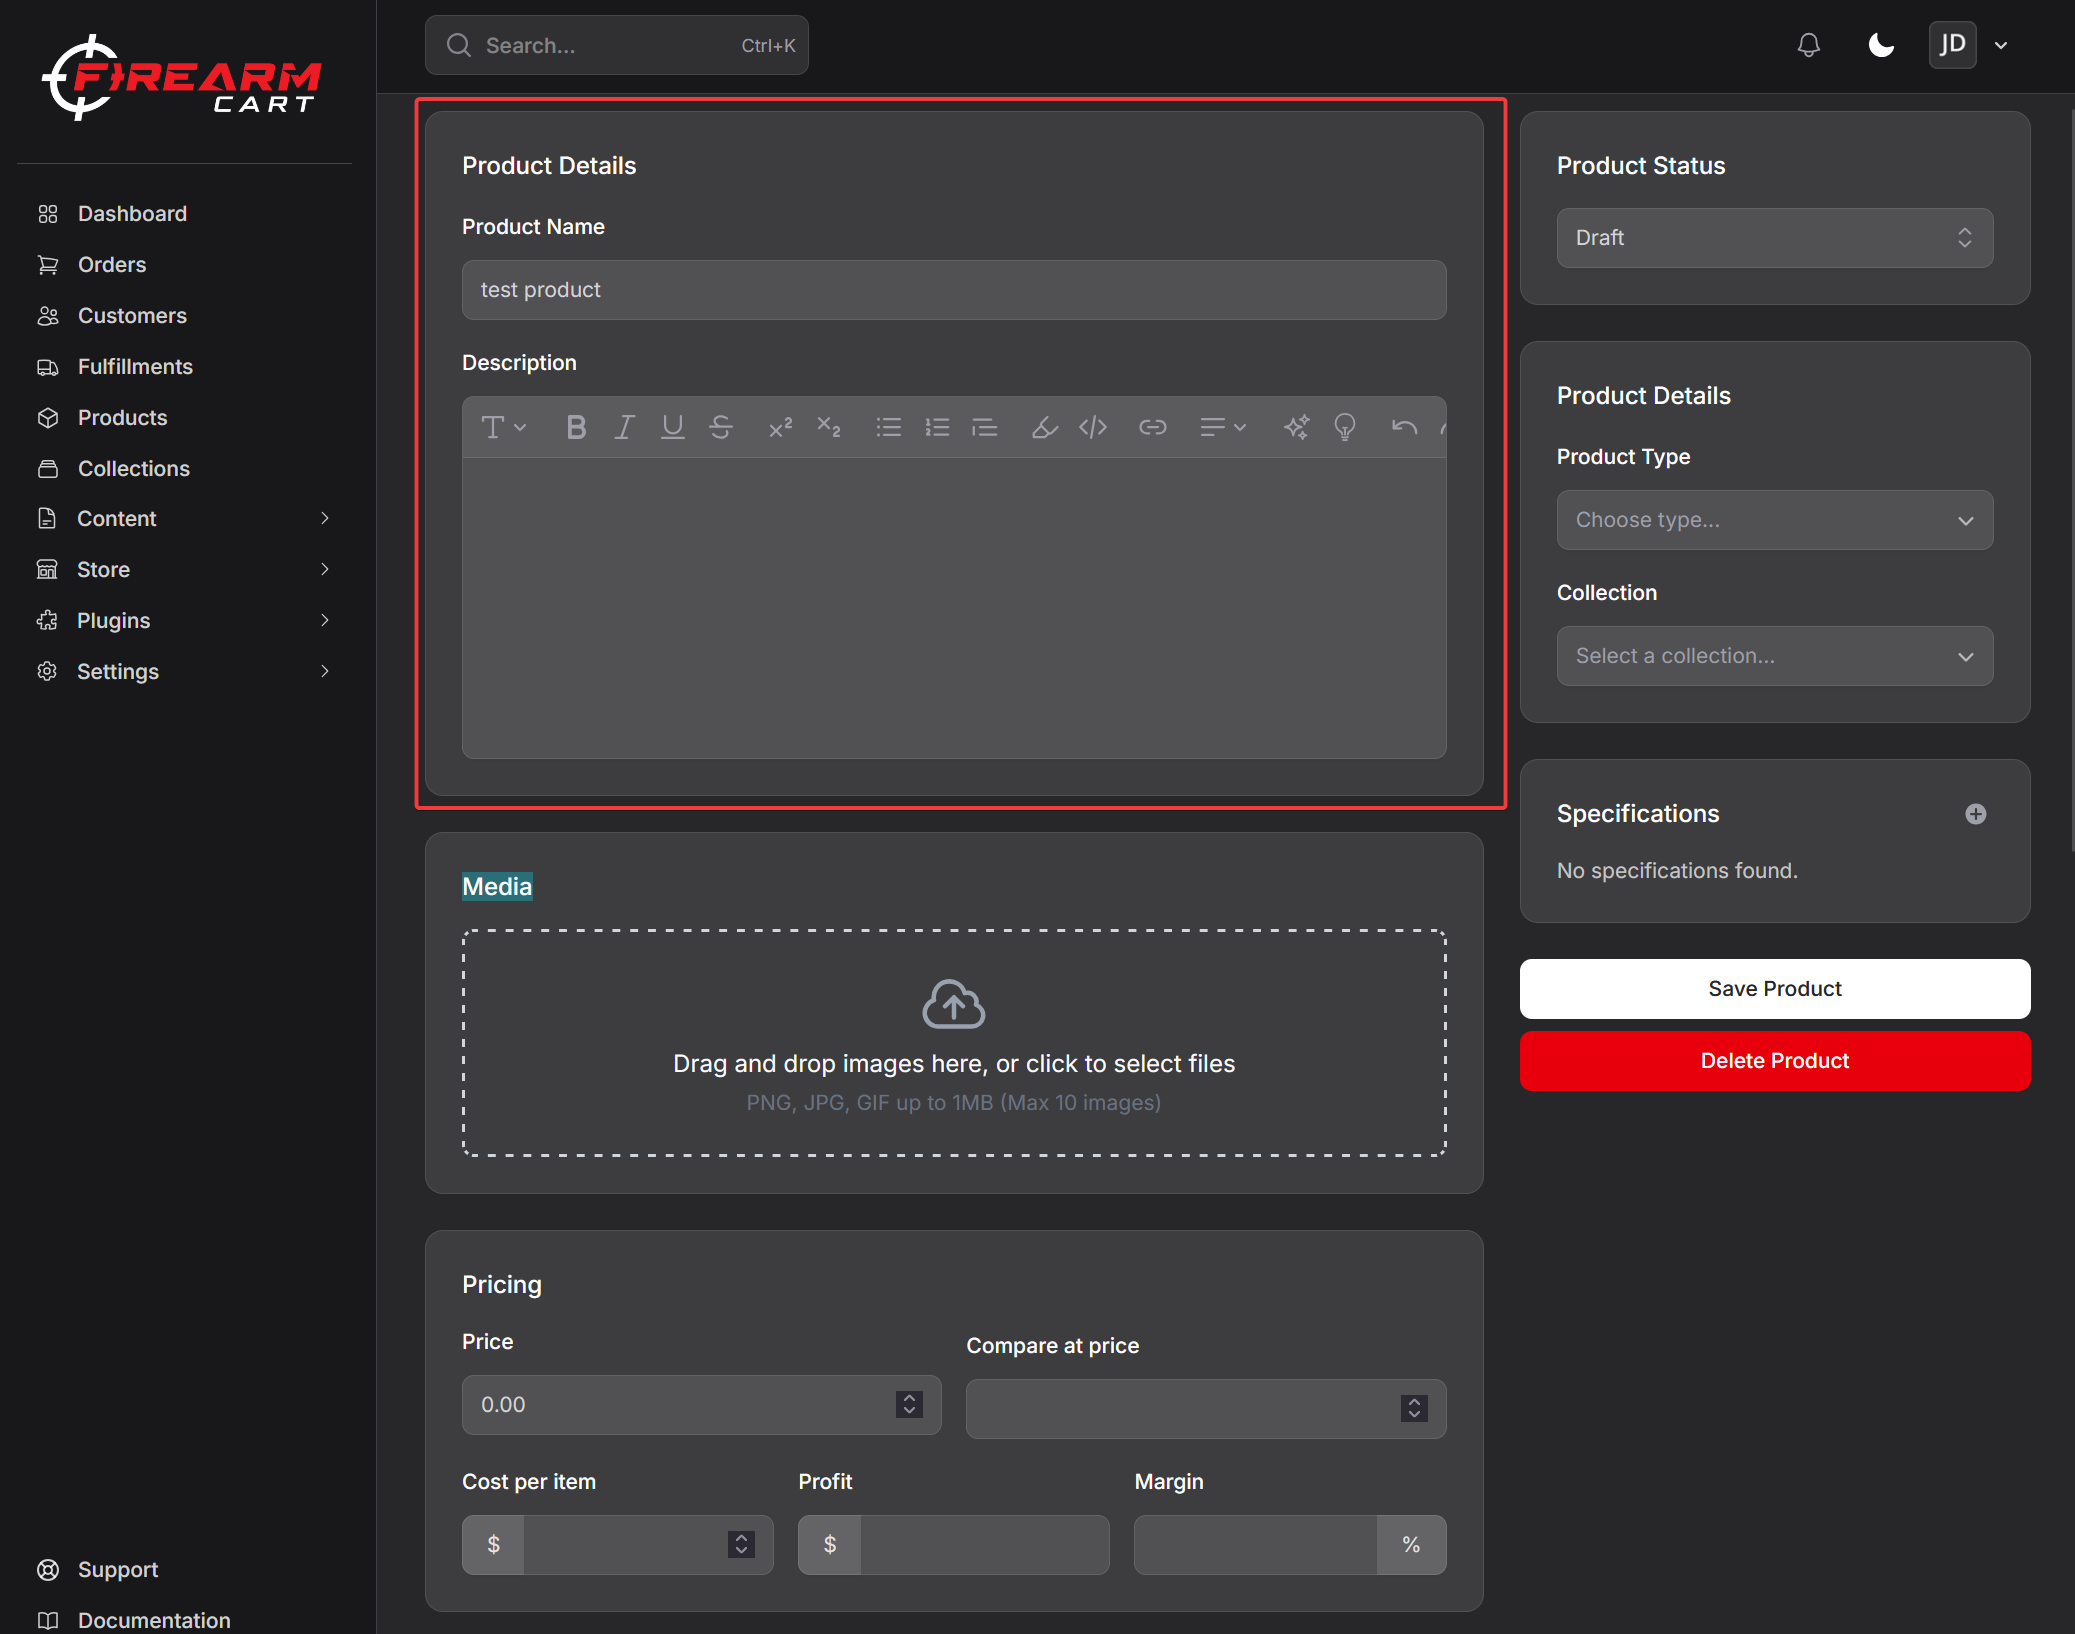
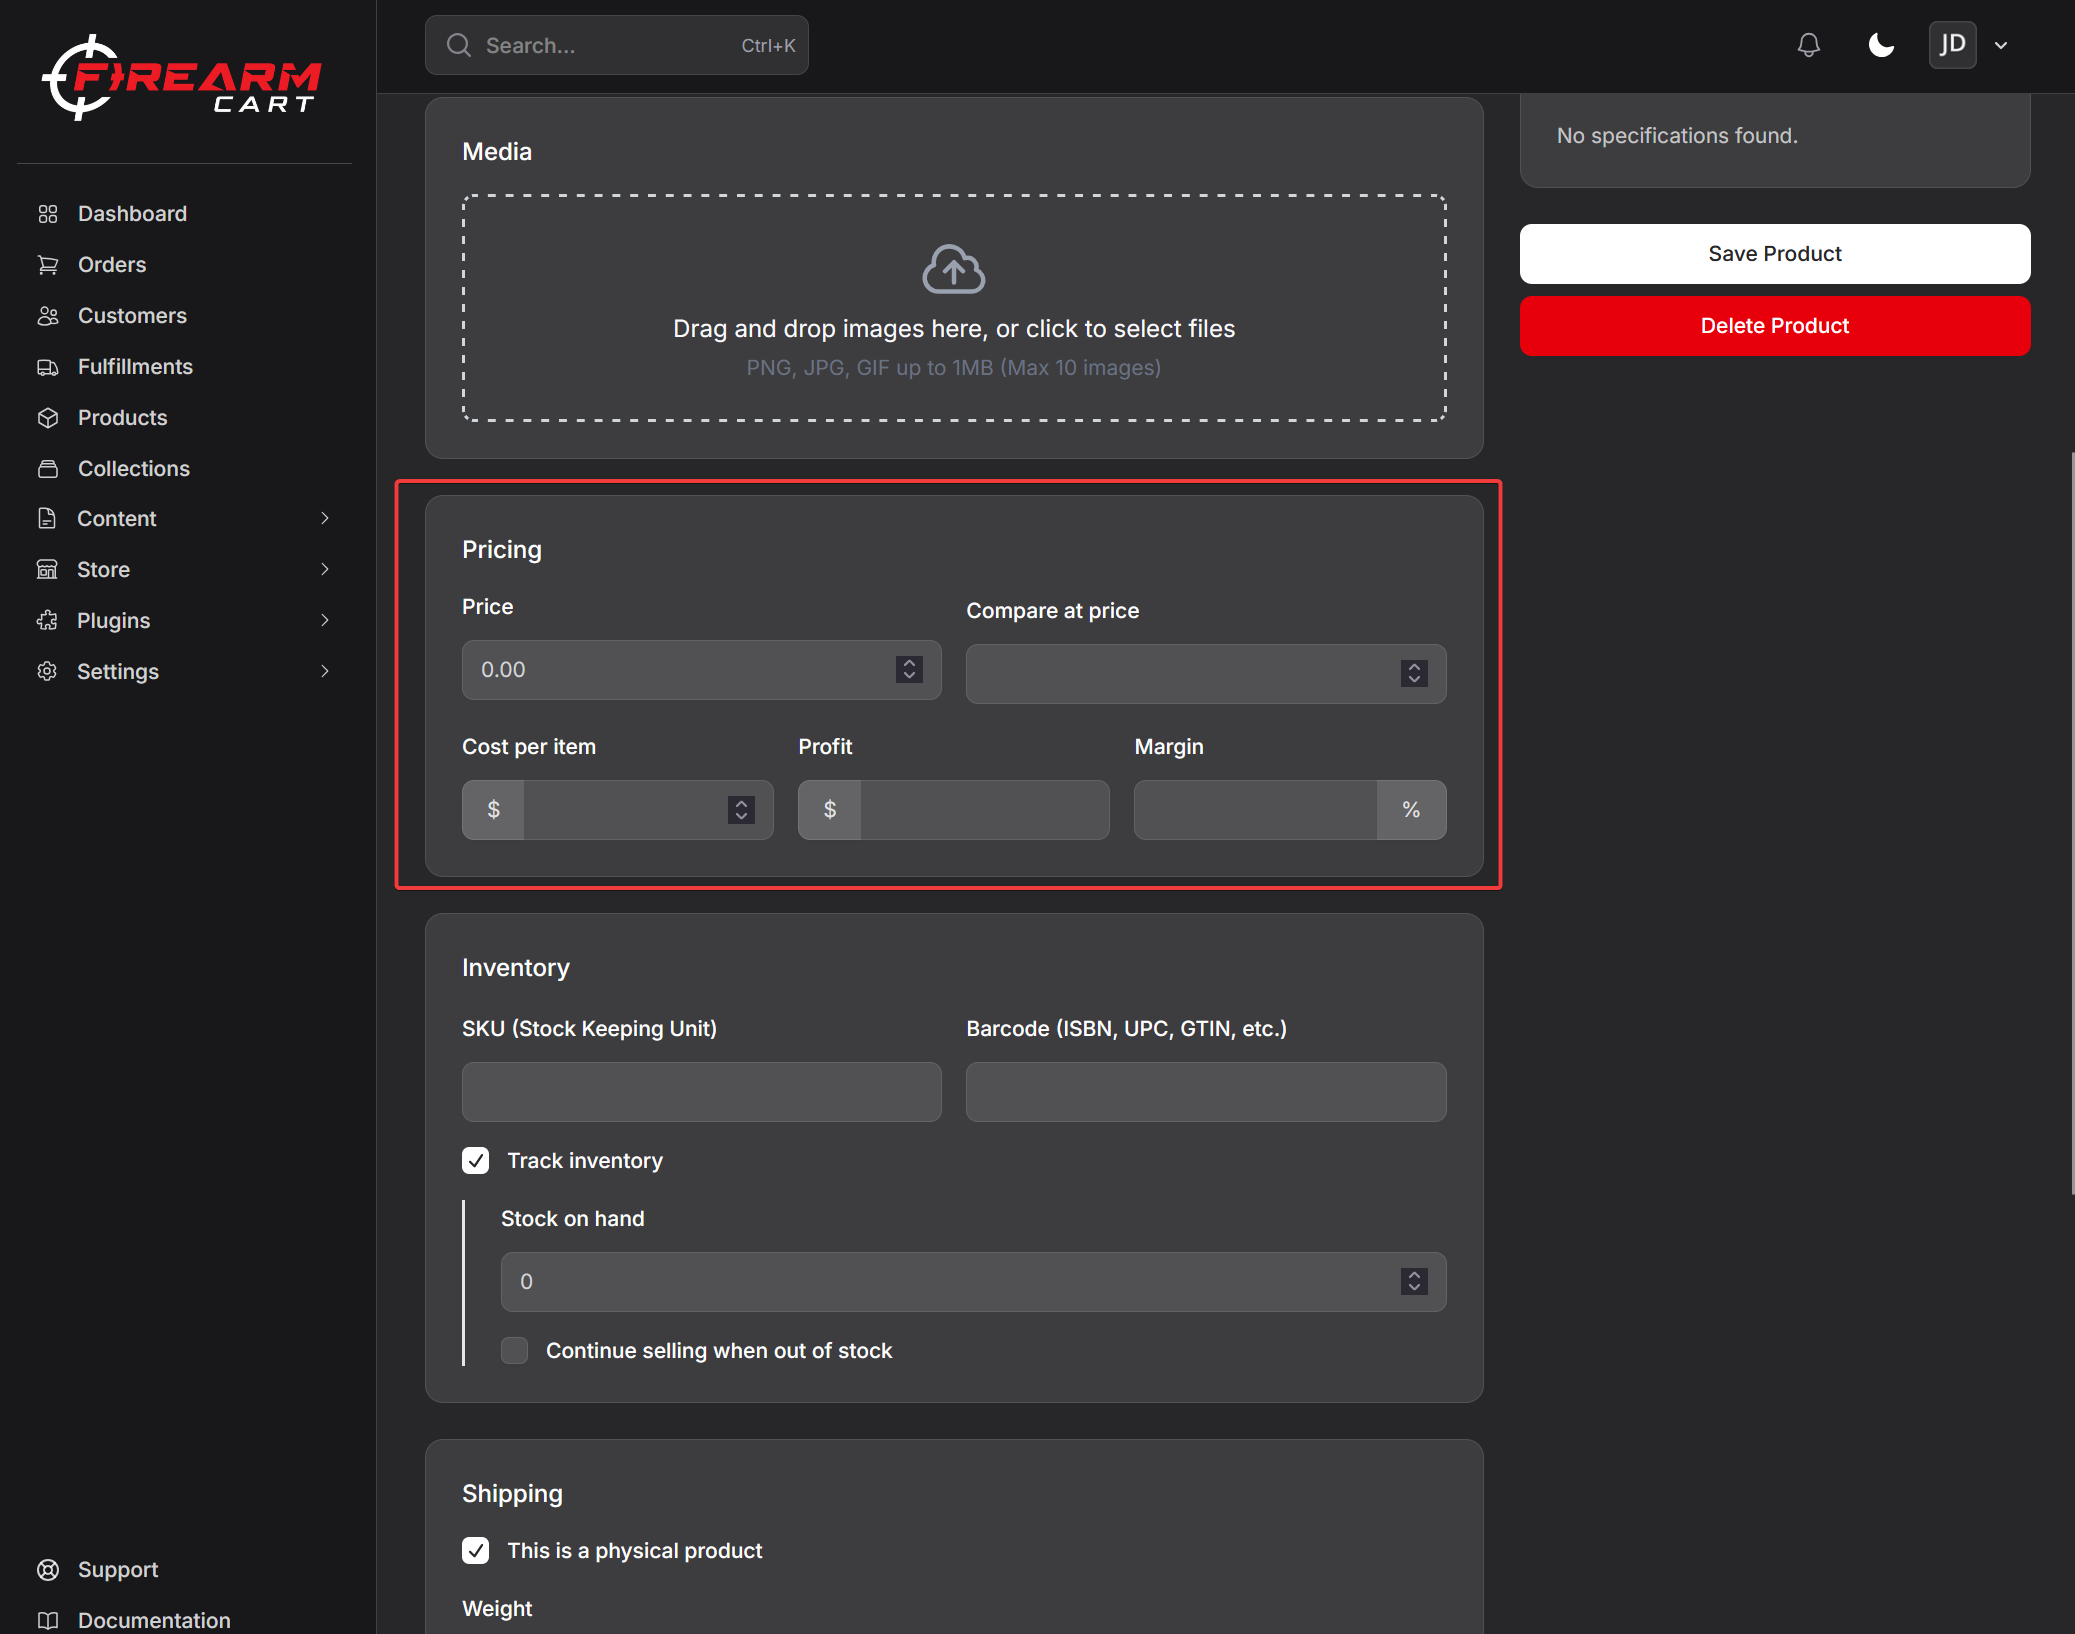
Pricing
- Price - Regular selling price
- Compare at price - Original price (shows as crossed out for sales)
- Cost per item - Your cost (for profit tracking, not shown to customers)
Firearm Specifications
FirearmCart includes specialized fields for firearm products:
- Product Type - Handguns, Rifles, Shotguns, Ammunition, Accessories
- Caliber/Gauge - .45 ACP, 9mm, 12 Gauge, etc.
- Action Type - Semi-automatic, Bolt Action, Pump, etc.
- Barrel Length - Measured in inches
- Overall Length - For compliance verification
- Capacity - Magazine capacity
- Manufacturer - Brand name
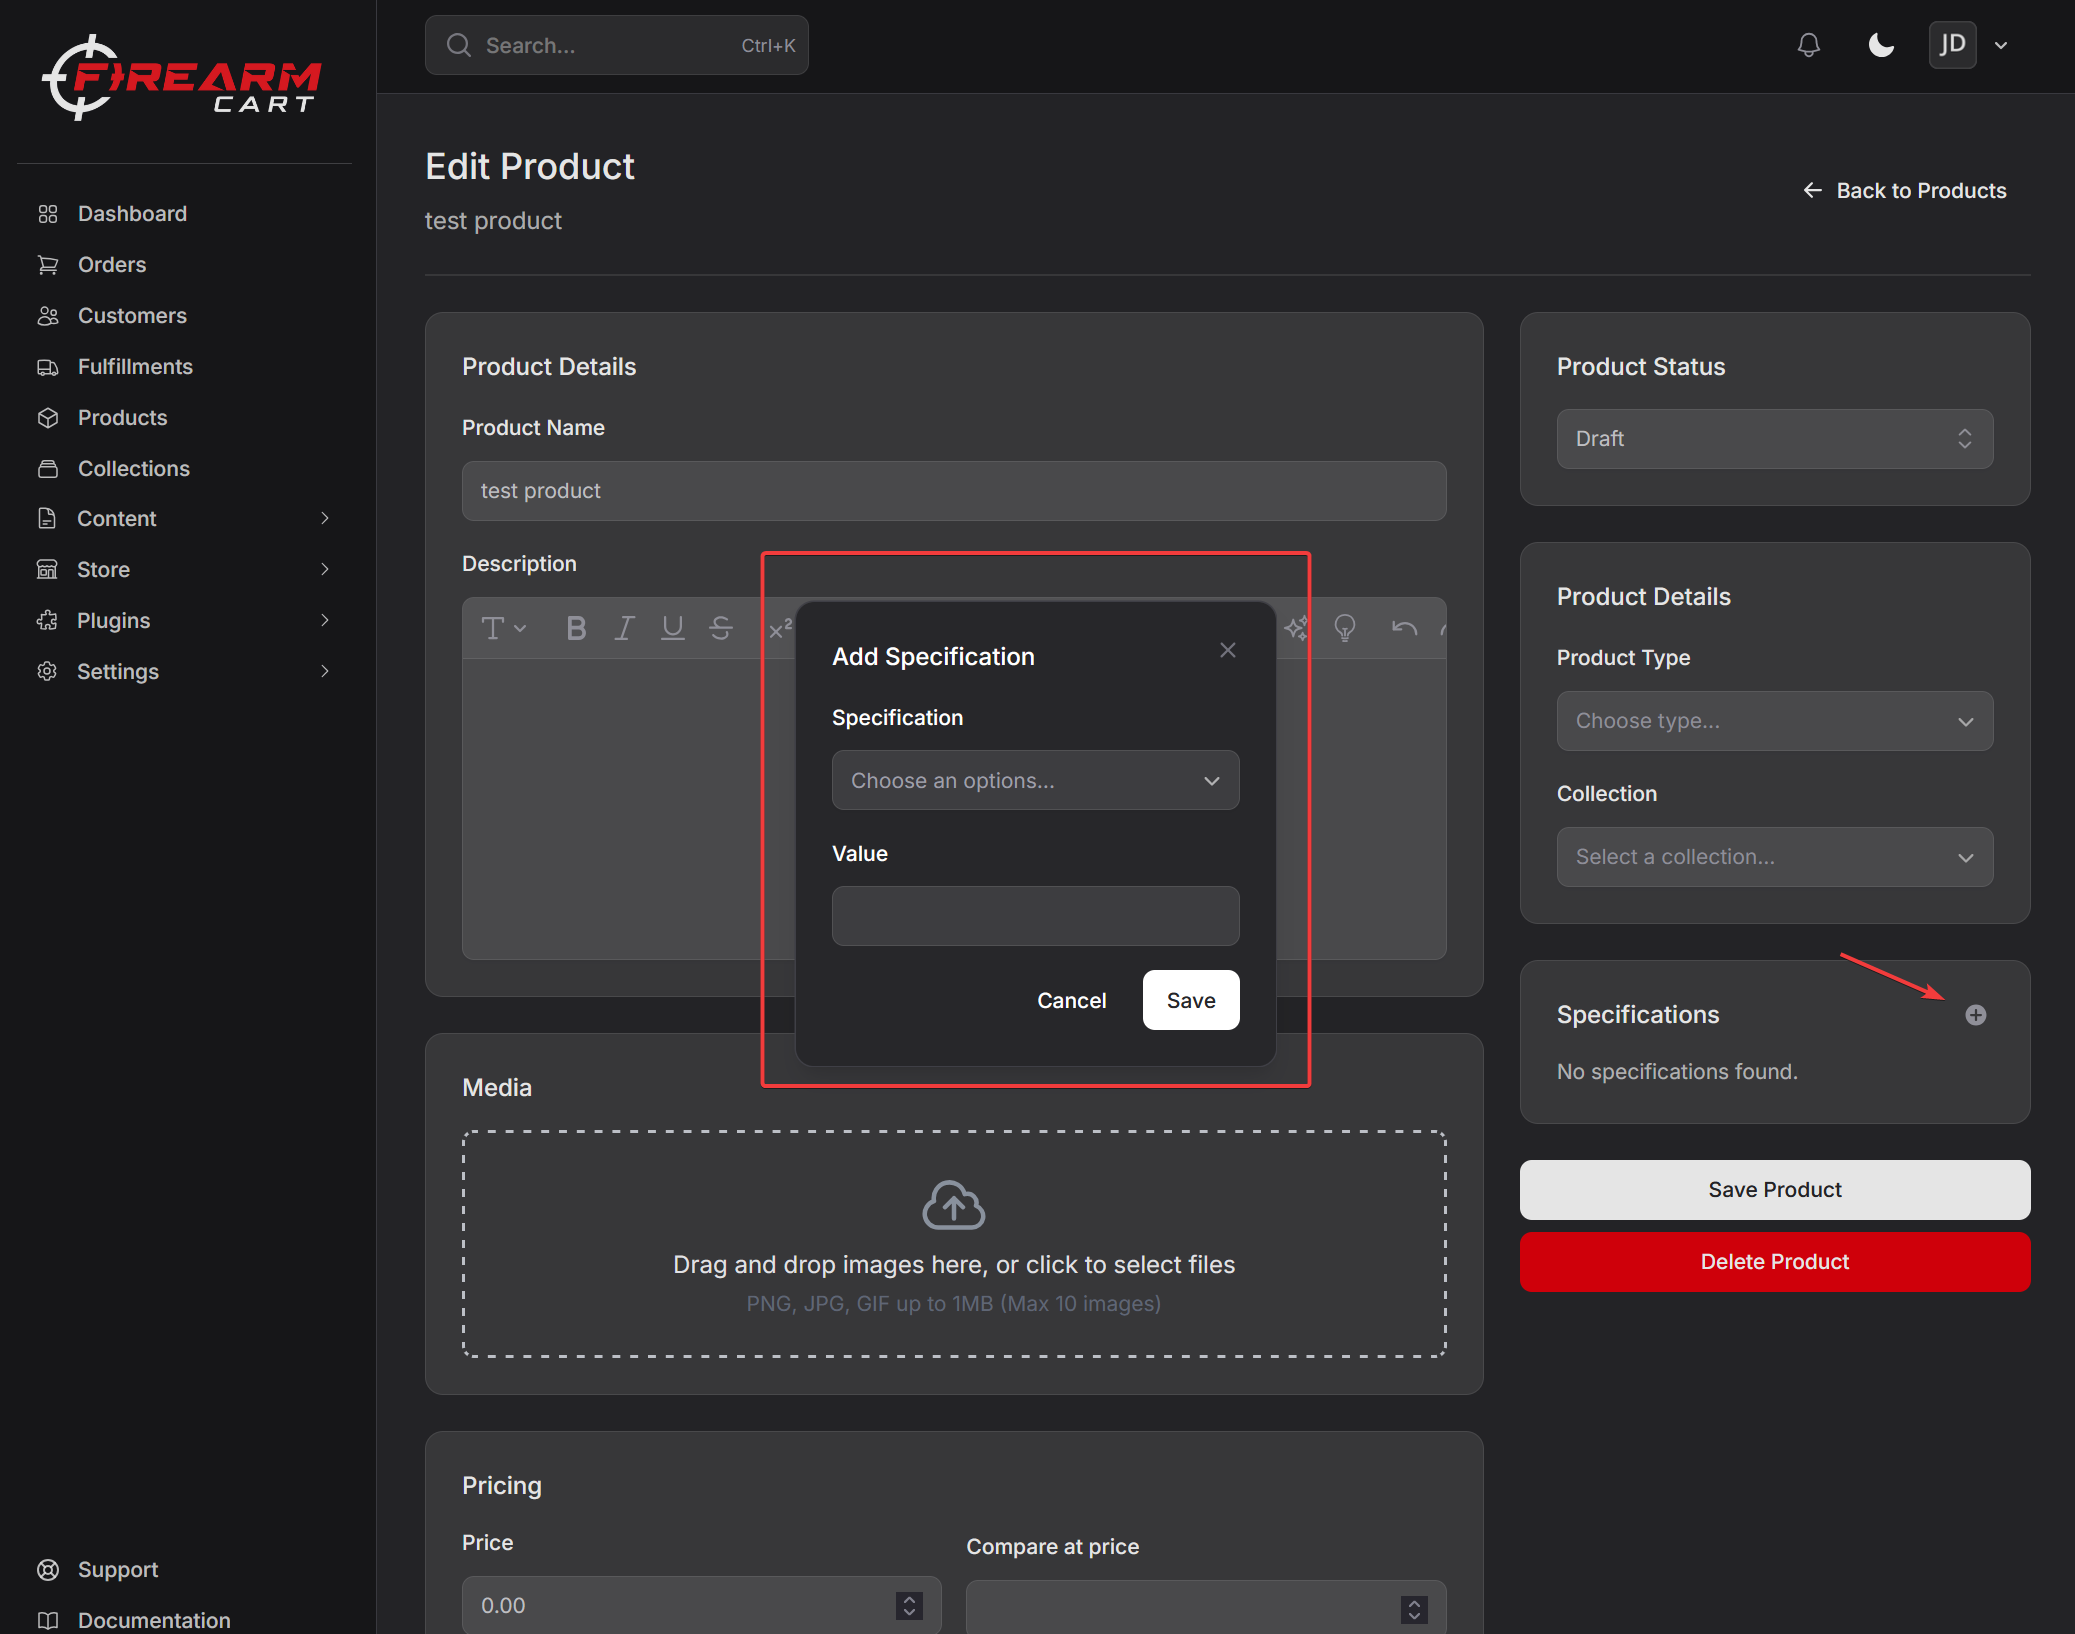
These specifications automatically generate a formatted specifications table on your product pages:
<table class="product-specifications">
  <tbody>
    <tr><th>Category</th><td>Handguns</td></tr>
    <tr><th>Caliber</th><td>9mm</td></tr>
    <tr><th>Action</th><td>Semi-Automatic</td></tr>
    <tr><th>Capacity</th><td>15+1</td></tr>
  </tbody>
</table>
Product Images
Upload high-quality images to showcase your products:
- Primary image - Main product photo (displayed in listings)
- Additional images - Multiple angles, details, included accessories
- Recommended size - 2048x2048 pixels, square format
- Supported formats - JPG, PNG, WebP
Product Variants
Create variants for products with different options:
- Example: Glock 19 available in Black, FDE, and Gray
- Example: AR-15 Lower Receiver in different colors or configurations
Collections
Organize products into collections for easier browsing:
- By Type - Handguns, Rifles, Shotguns, Ammunition
- By Brand - Glock, Smith & Wesson, Ruger
- By Purpose - Home Defense, Concealed Carry, Hunting
- Sales - Clearance, Weekly Specials
Step 5: Theme Customization
FirearmCart uses a powerful theme system. You can customize your store's appearance without any coding knowledge using the Visual Editor.
Choosing a Theme
Your store comes with the Horizon theme by default. Additional themes are available:
| Theme | Style | Best For |
|---|---|---|
| Horizon | Modern, clean | General retail |
| Vision | Bold, image-focused | High-end products |
| Reformation | Classic, professional | Established dealers |
| Tinker | Minimal, fast | Mobile-first stores |
Visual Theme Editor
The Visual Editor lets you customize your theme in real-time:
- Navigate to Online Store > Themes
- Click Customize on your active theme
- Use the sidebar to edit sections and settings
- Preview changes instantly in the preview pane
- Click Save when finished
Customizable Elements
Global Settings
- Colors and color schemes
- Typography (fonts, sizes)
- Logo and favicon
- Social media links
- Cart behavior
Page Sections Each page is built from sections that you can:
- Add - Insert new sections from the library
- Remove - Delete sections you don't need
- Reorder - Drag sections to rearrange
- Configure - Edit section settings and content
Section Examples
- Header - Logo, navigation, cart icon
- Hero Banner - Large featured image with text
- Featured Collection - Showcase products from a collection
- Image with Text - Product stories or about content
- Footer - Links, contact info, newsletter signup
Developer Mode
For advanced customization, enable Developer Mode:
- Navigate to Online Store > Themes
- Click the ... menu on your theme
- Select Enable Developer Mode
Developer Mode:
- Bypasses template caching for instant changes
- Auto-expires after 1 hour for performance
- Useful when working with custom Liquid code
Learn more about Theme Customization
Step 6: Custom Domain (Optional)
Connect your own domain for a professional storefront. Instead of yourstore.firearmcart.com, customers will see www.yourdomain.com.
Connect an Existing Domain
- Navigate to Settings → Domains
- Click Connect existing domain
- Enter your domain (e.g.
shop.yourdomain.com) - Add the CNAME record shown at your DNS provider
DNS Configuration
You only need one CNAME record at your registrar:
| Type | Host | Points to |
|---|---|---|
| CNAME | your domain or subdomain | stores.firearmcart.com |
That's it — no nameserver changes, no A records, no extra DNS setup. Your existing email, blog, and other DNS records continue to work unchanged.
Using Cloudflare for your DNS? Make sure the proxy status is DNS only (grey cloud), not proxied (orange cloud).
SSL Certificate
FirearmCart automatically provisions a free SSL certificate for your domain once DNS propagates:
- Automatic provisioning — usually active within 5–30 minutes
- Automatic renewal — certificates renew on their own
- Full encryption — all traffic is encrypted end-to-end
Multiple Domains
You can connect as many domains as you want. Mark one as Primary — that's the canonical URL shown to customers. Non-primary domains automatically redirect to the primary.
Learn more about Custom Domains
Step 7: Launch Your Store
You've configured everything - now it's time to go live!
Pre-Launch Checklist
Before launching, verify:
- Store information is complete and accurate
- Payment processing is connected and tested
- Shipping zones and rates are configured
- At least one product is published
- Theme is customized with your branding
- Policies are in place (privacy, shipping, returns)
- Test order placed successfully
Placing a Test Order
Always test your checkout flow:
- Add a product to cart
- Complete checkout with test card
- Verify order appears in dashboard
- Check confirmation emails
- Cancel/refund the test order
Going Live
When you're ready:
- Navigate to Settings > General
- Find the Store status section
- Toggle Password protection off
- Your store is now live!
Post-Launch
After launching:
- Monitor orders - Check your dashboard regularly
- Respond to customers - Answer questions promptly
- Track analytics - Review traffic and sales data
- Optimize - Refine based on customer behavior
Need Help?
Documentation
Browse our comprehensive documentation for detailed guides on every feature:
- Store Setup - Complete store configuration
- Products - Product management and inventory
- Orders - Processing and fulfillment
- Themes - Theme customization and development
- Integrations - Third-party connections
FAQ
Check our Frequently Asked Questions for answers to common questions about:
- Account setup
- Payment processing
- Shipping configuration
- Theme customization
- Compliance requirements
Contact Support
Need personalized help? Our support team understands the firearms industry:
- Support Tickets: Navigate to Support in your dashboard to create a ticket
- Categories: General, Technical, Billing, Feature Request, Bug Report
- Priority Levels: Low, Medium, High, Urgent
- File Attachments: Include screenshots to help explain your issue
What's Next?
Now that your store is set up, explore these guides to grow your business:
- Adding Products in Bulk - Import inventory from spreadsheets
- FFL Network - Connect with dealers for transfers
- Marketing Tools - Email campaigns and promotions
- Analytics - Understand your customers and sales